
Uncategorized
Dry Cured Italian & Genoa Salami

I will be using the Umai Dry method for this salami. It has taken dry curing meats to an almost fail safe level. It has never been easier to dry cure muscle meats & salami at home than it is with Umai Dry. Let’s get started. The process is the same for the Italian & the Genoa. I will include the recipes for both.

The first thing you need to do is get some Umai Dry Bag 50mm casings. You will be stuffing your seasoned mixtures into the casings just like you would when making thuringer or beefstick. You will also need a grated rack to place your salami on to cure in the refrigerator. So grind the meat, season, mix & stuff into Umai casings.

You will want to weigh each salami in grams & identify, date, show weight and target weight. Then place in a warm place (72-74 degrees) for 72 hours. They will turn from a dull brown to bright red as the culture is fermenting your salami.

Now place the salami in the refrigerator on your grated rack. The salami will start to lose moisture. The casing will become lose and wrinkled. That is what it’s supposed to do. After 3 weeks weigh each salami to see how close to your target weight each one is. Mine usually takes about 28 days to lose 35 percent of it’s original weight.


Once the target weight is reached, remove the Umai casing and vacuum pack each salami. I like to store mine in the wine cooler or refrigerator. It can also be stored for short periods of time (1-3 days) at room temp For travel or shipping. Be sure to refrigerate after removing from the vacuum bags.


Genoa Salami Recipe
4 lbs pork shoulder
1 lb beef chuck
4 1/2 Tbsp kosher salt
1 1/2 Tbsp corn syrup solids
1 1/2 Tbsp coarse black pepper
1/2 Tbsp garlic granules
1 tsp instacure #2
1/2 oz powdered dextrose
1/2 tsp ground coriander
1/4 cup dry red wine
1 tsp T-SPX diluted in 2 Tbsp water
Italian Salami Recipe
4 lbs. Pork butt
1 lb. beef chuck
4 1/2 Tbs kosher salt
1 tsp Instacure#2
1 1/2 tsp Powdered dextrose
1 1/2 tsp Ground white pepper
1 1/2 tsp White peppercorns
1 tsp Garlic granules
1 Tbsp crushed fennel seeds
1 tsp Bactoferm T-SPX
2 Tbs Corn syrup solids
1/4 Cup dry red wine
Directions
Cut meat into strips. Partially freeze. Grind meat. Mix Bactoferm T-SPX into 1/4 cup warm water. Mix in all the ingredients and place in a Kitchen Aid mixer and using the dough hook mix at low speed for 4 minutes. Stuff into Umai Dry Bag 50mm casings. Place in a warm place for 72 hours. Dry in the refrigerator until the target weight is reached. It usually takes about 4 weeks. Remove from Umai casing and vacuum pack. Will keep indefinitely.
Pastrami Revisited
 This is an update to my original recipe for Home Cured Pastrami. I reduced the amount of pastrami seasonings pressed to the meat in an effort to retain the flavor but reduce the mess made when slicing on a meat slicer.
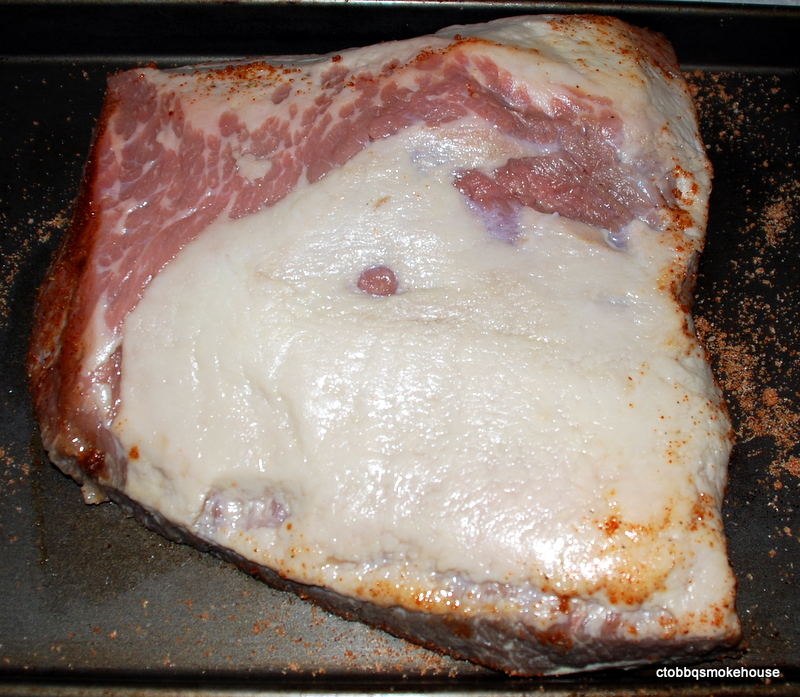
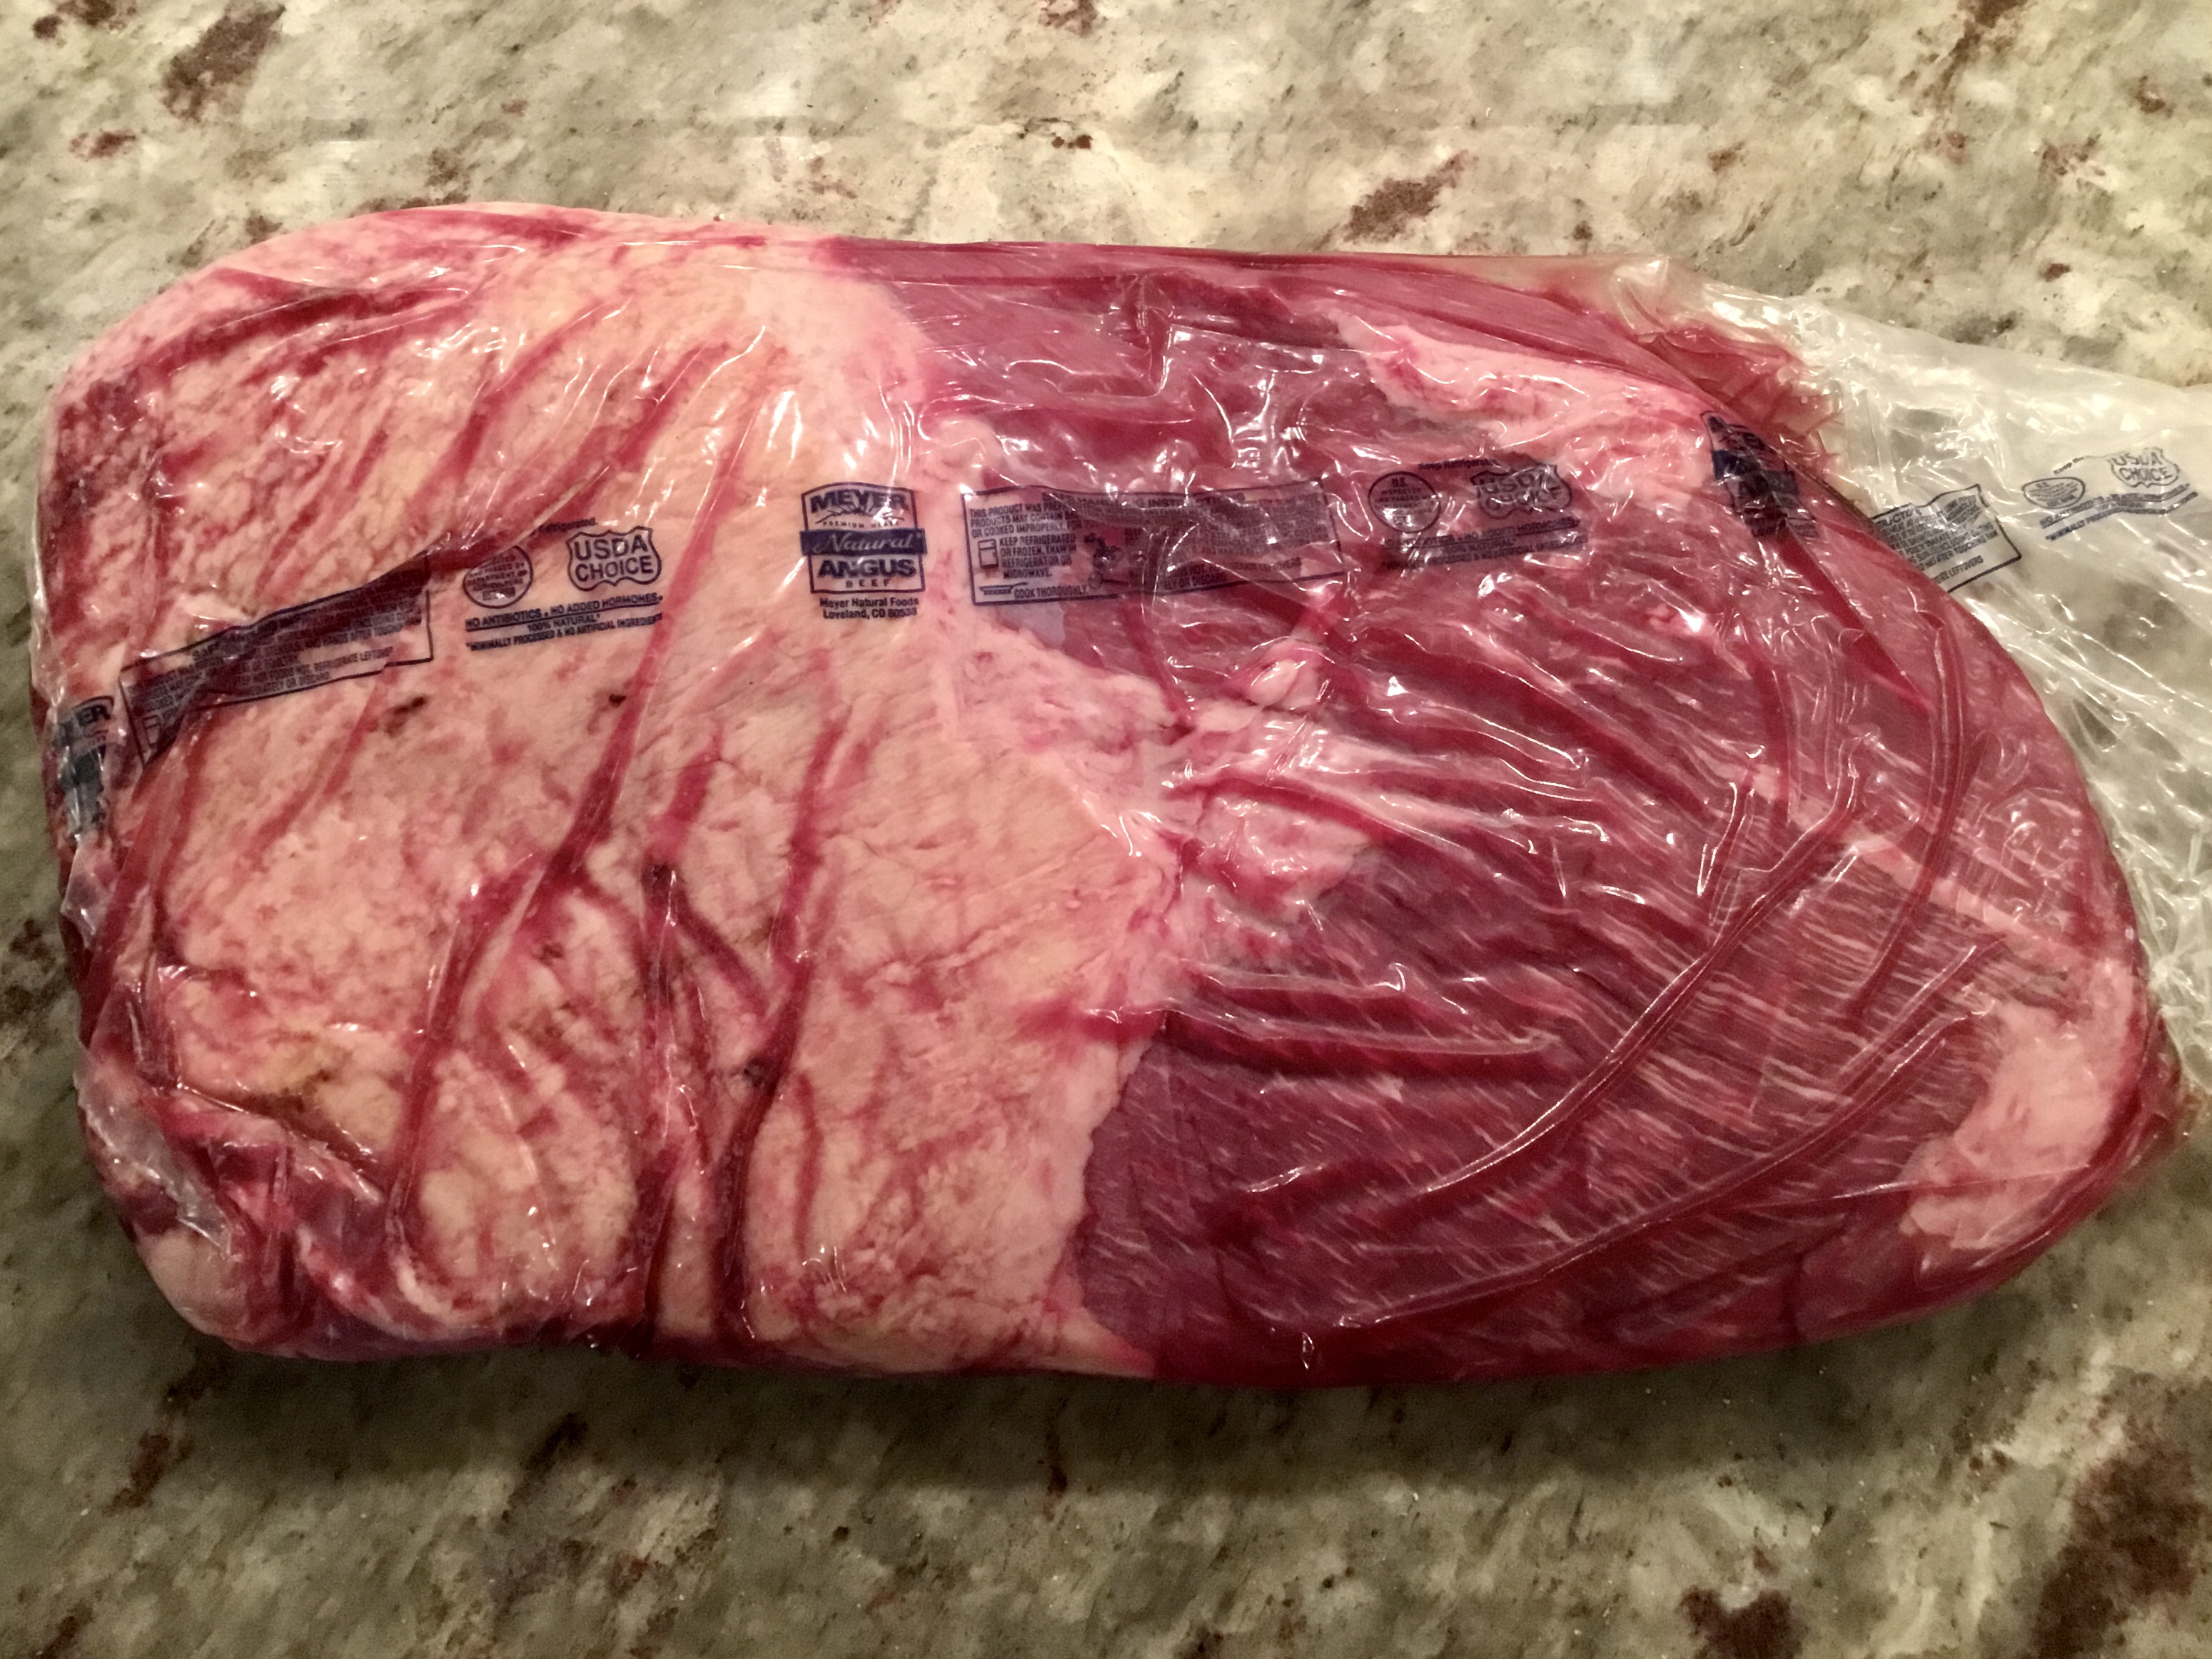 Start with a choice or prime grade of beef brisket flat.
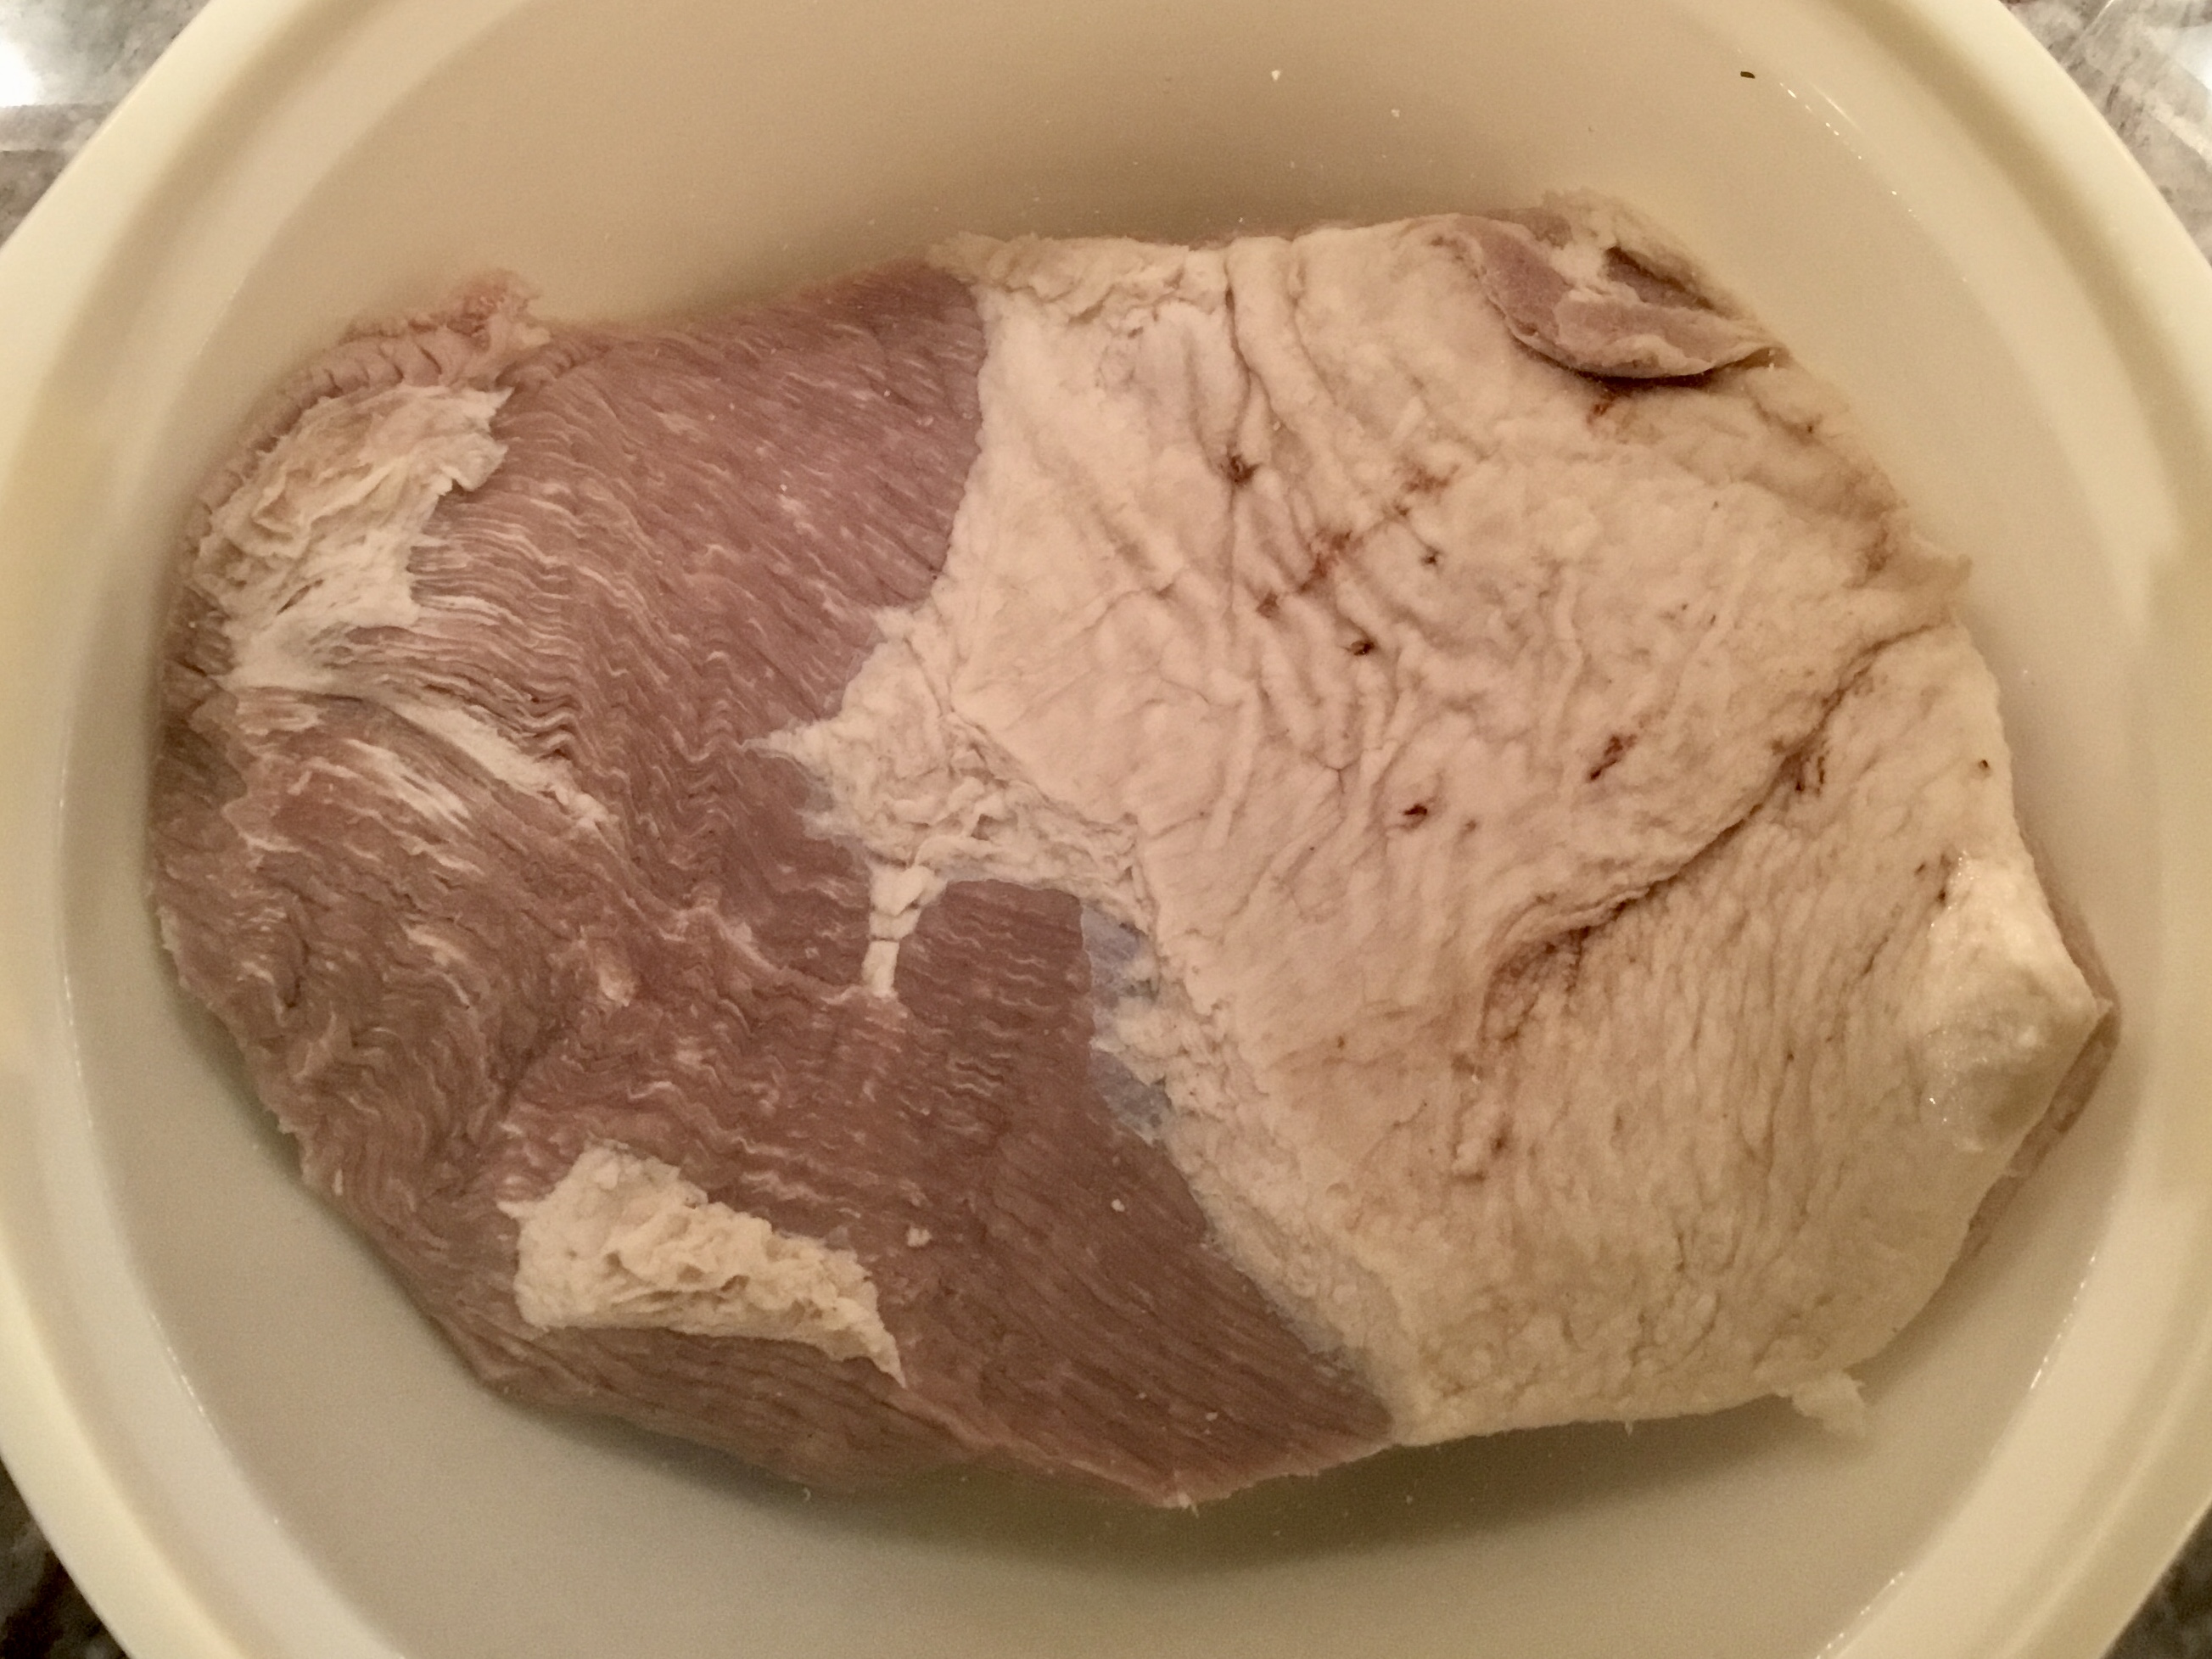
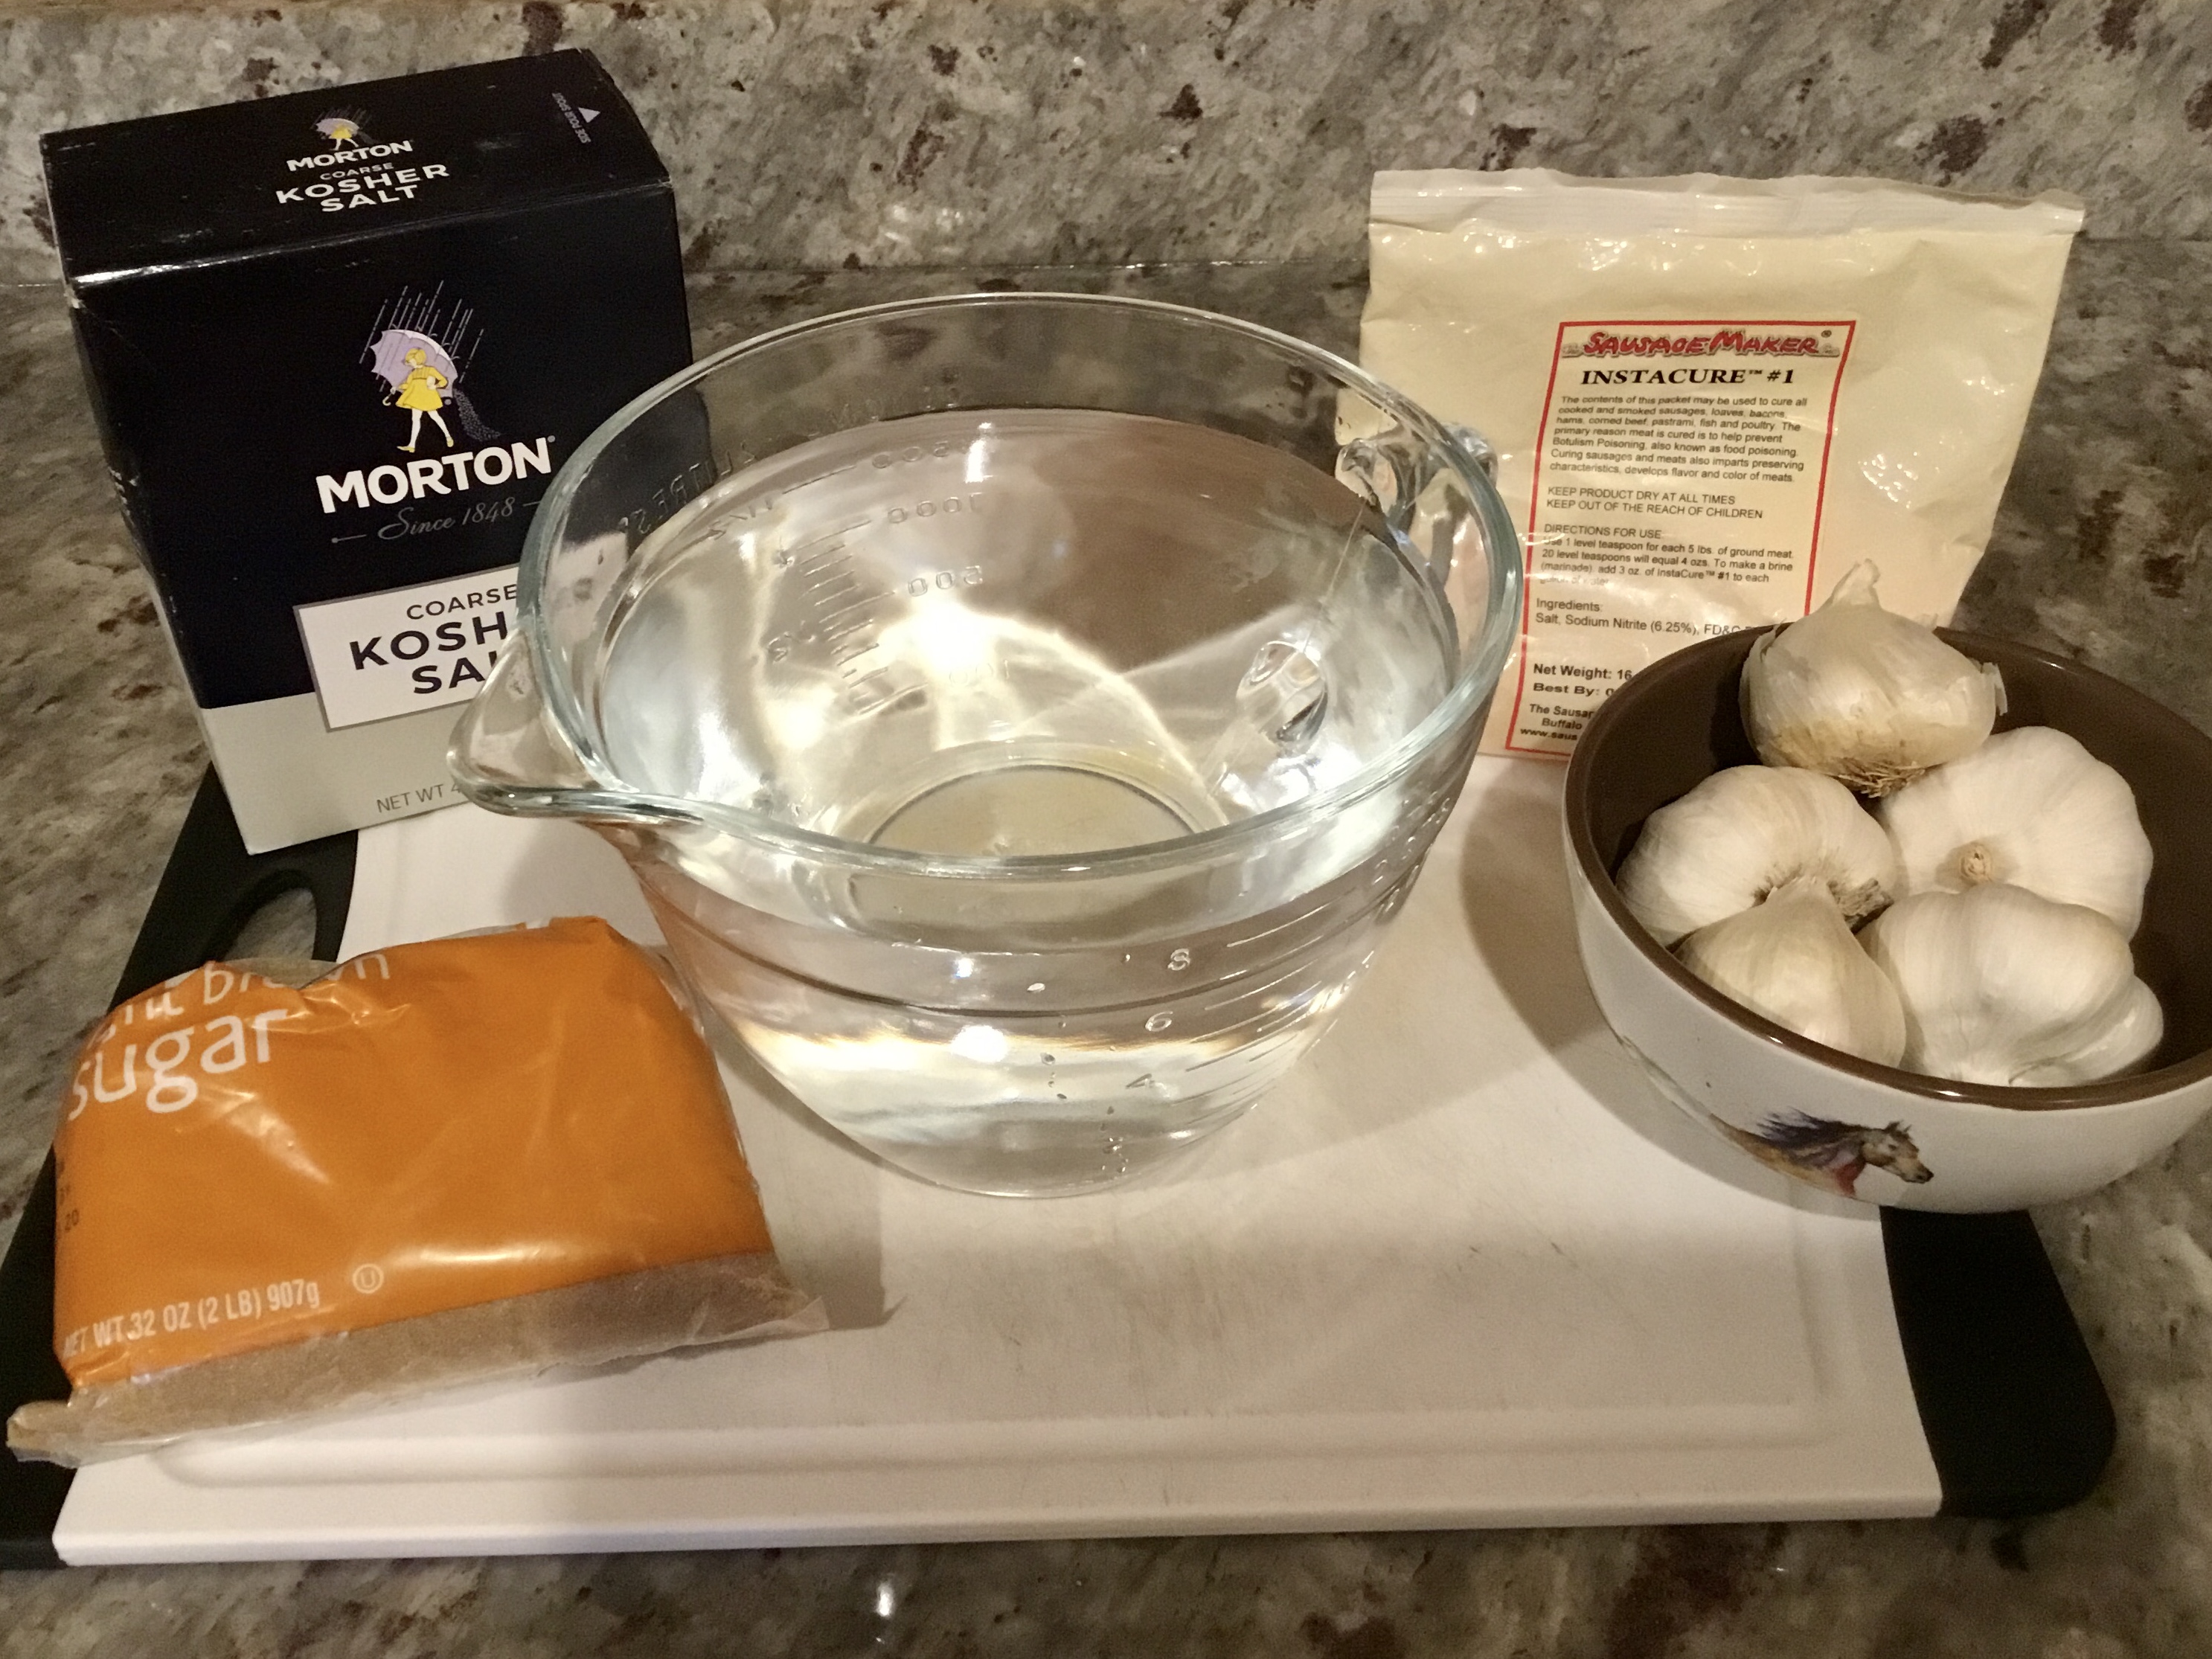 Prepare your brine.


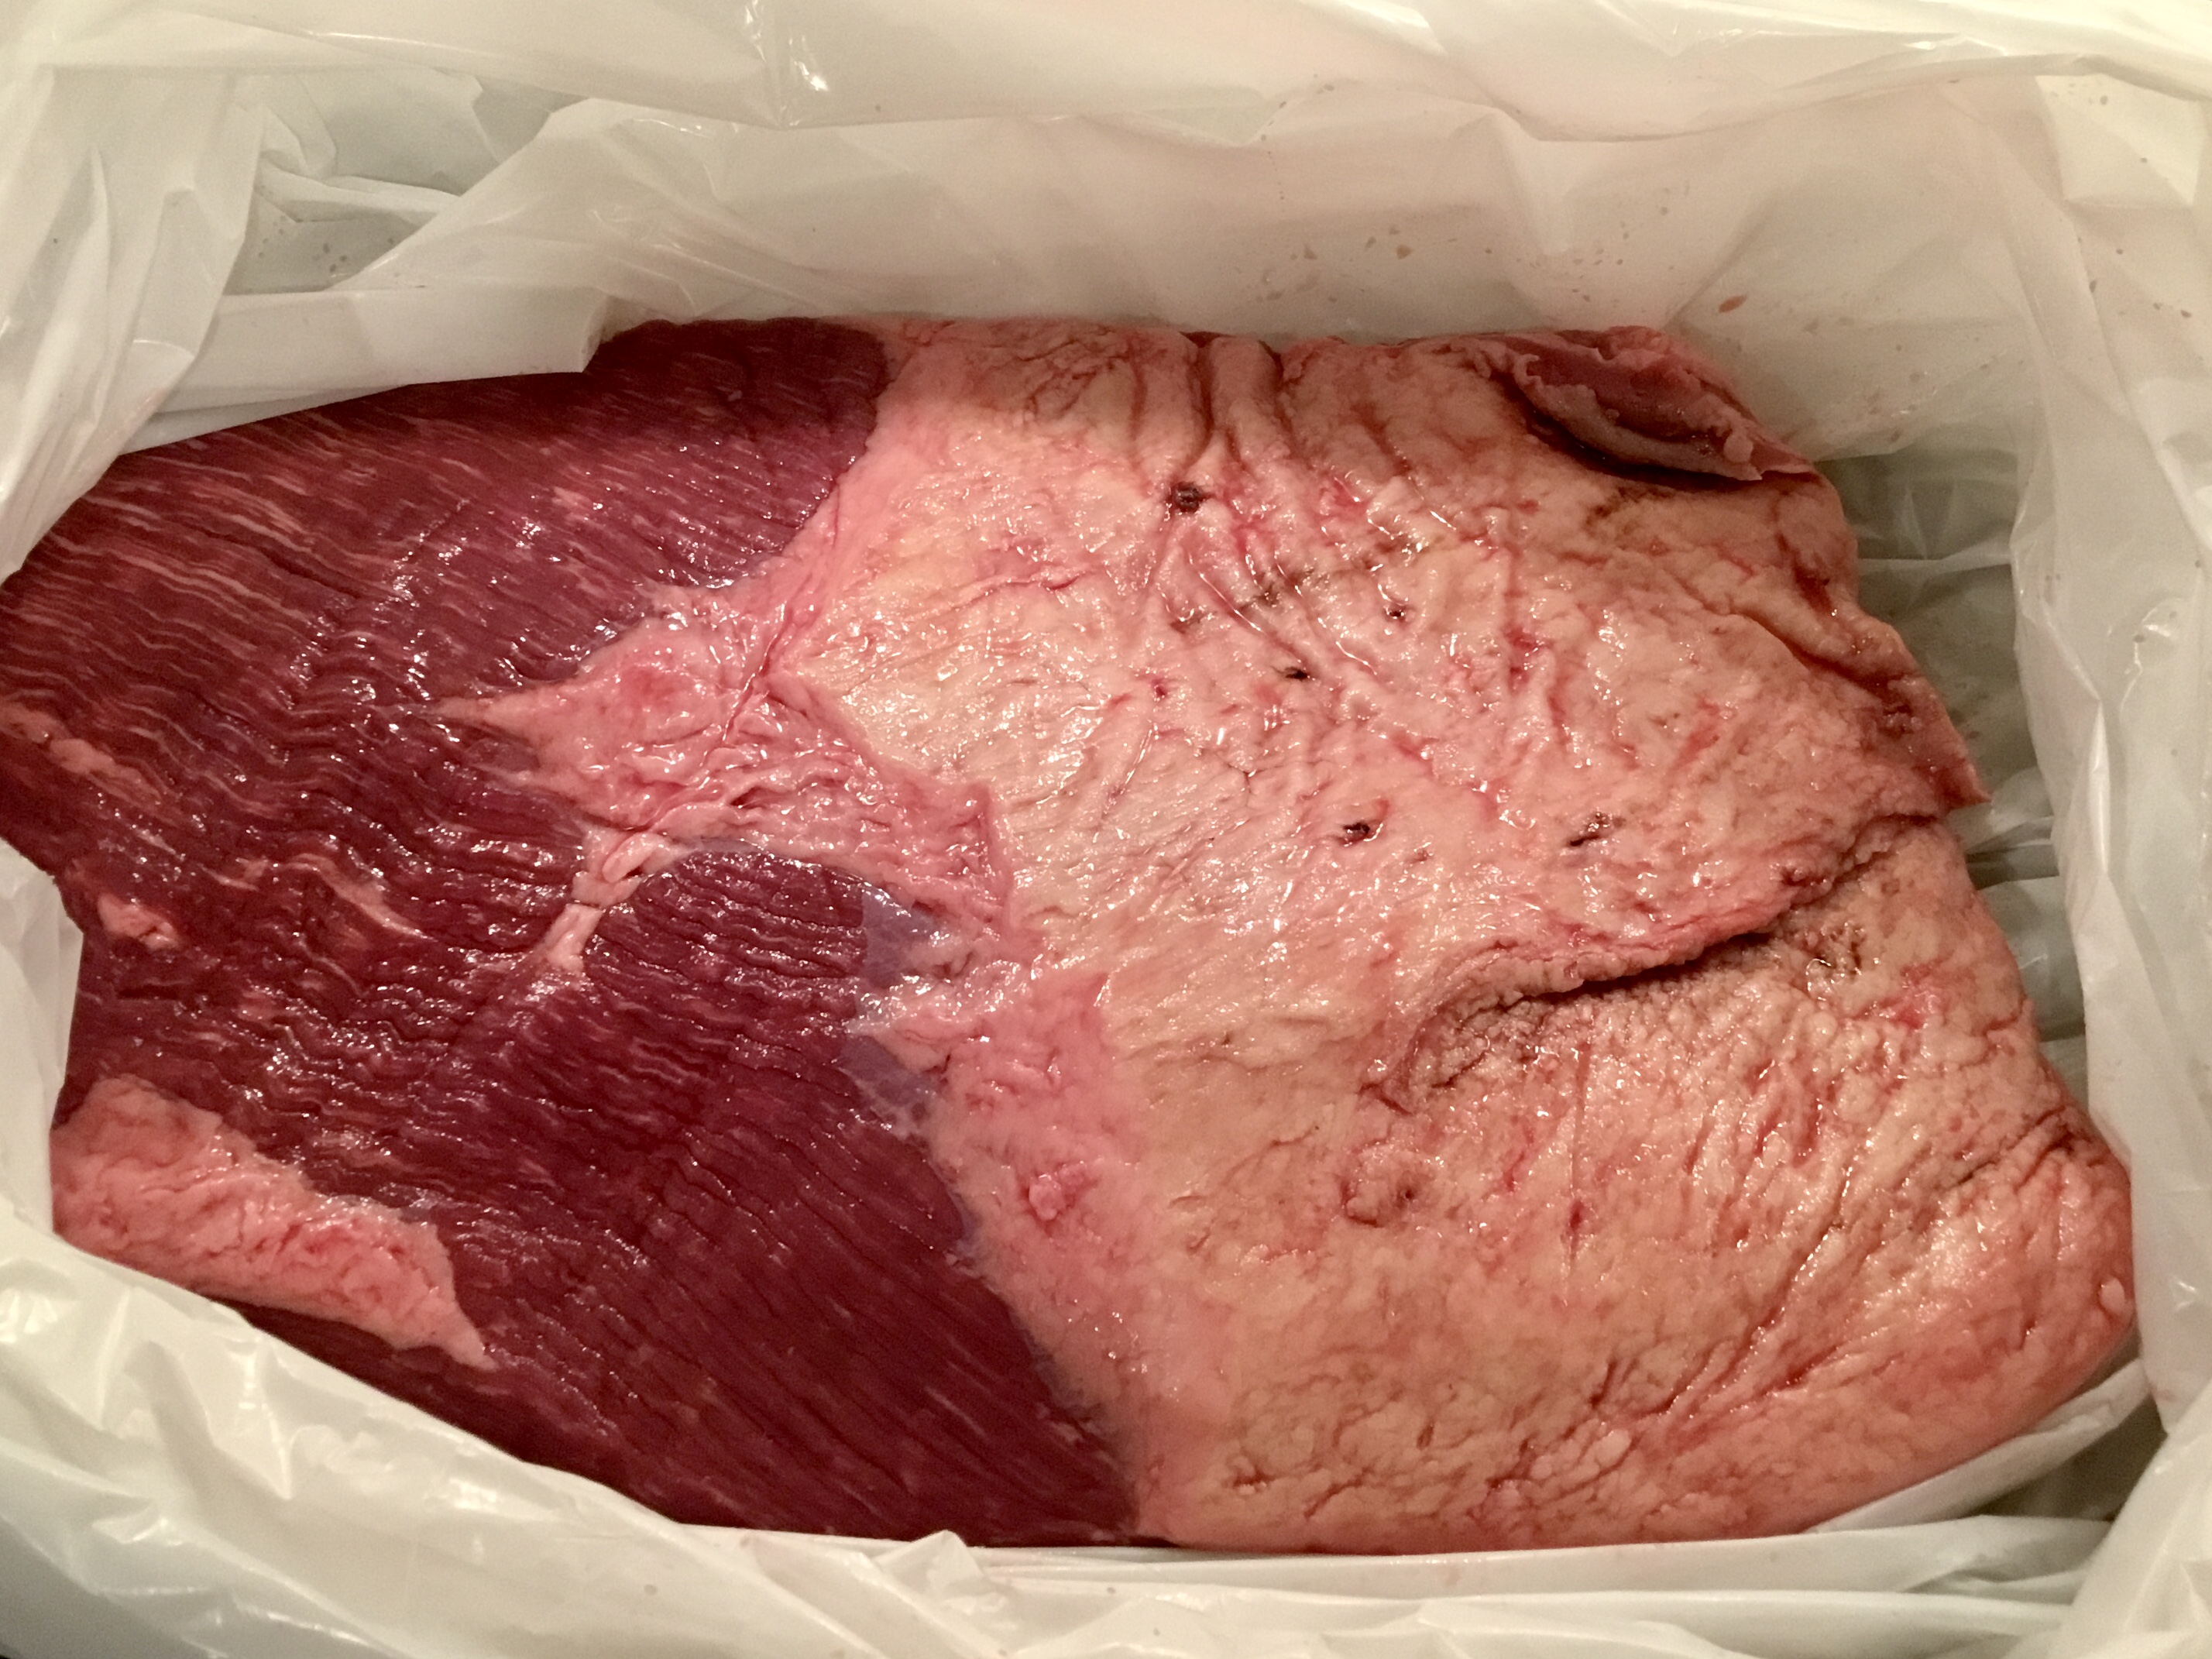
Put your beef in a plastic bag and pour the brine over the meat. Remove air and seal bag.
 Cure for 7 and up to 14 days. I prefer 14 days for the larger flats, 7-9 lbs.
 Soak in clean un chlorinated water for 4 hours to remove excess salt. Don’t skip this step.
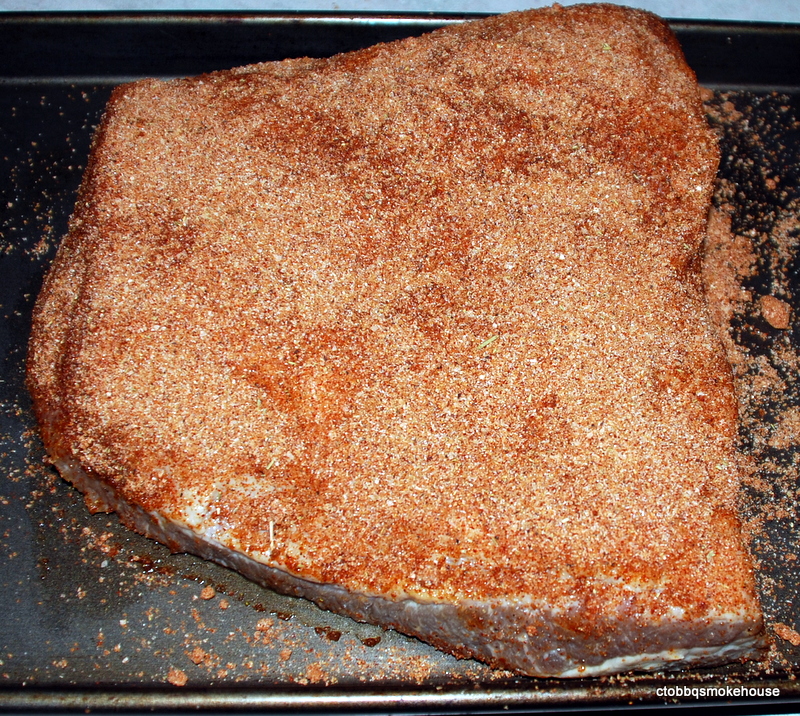
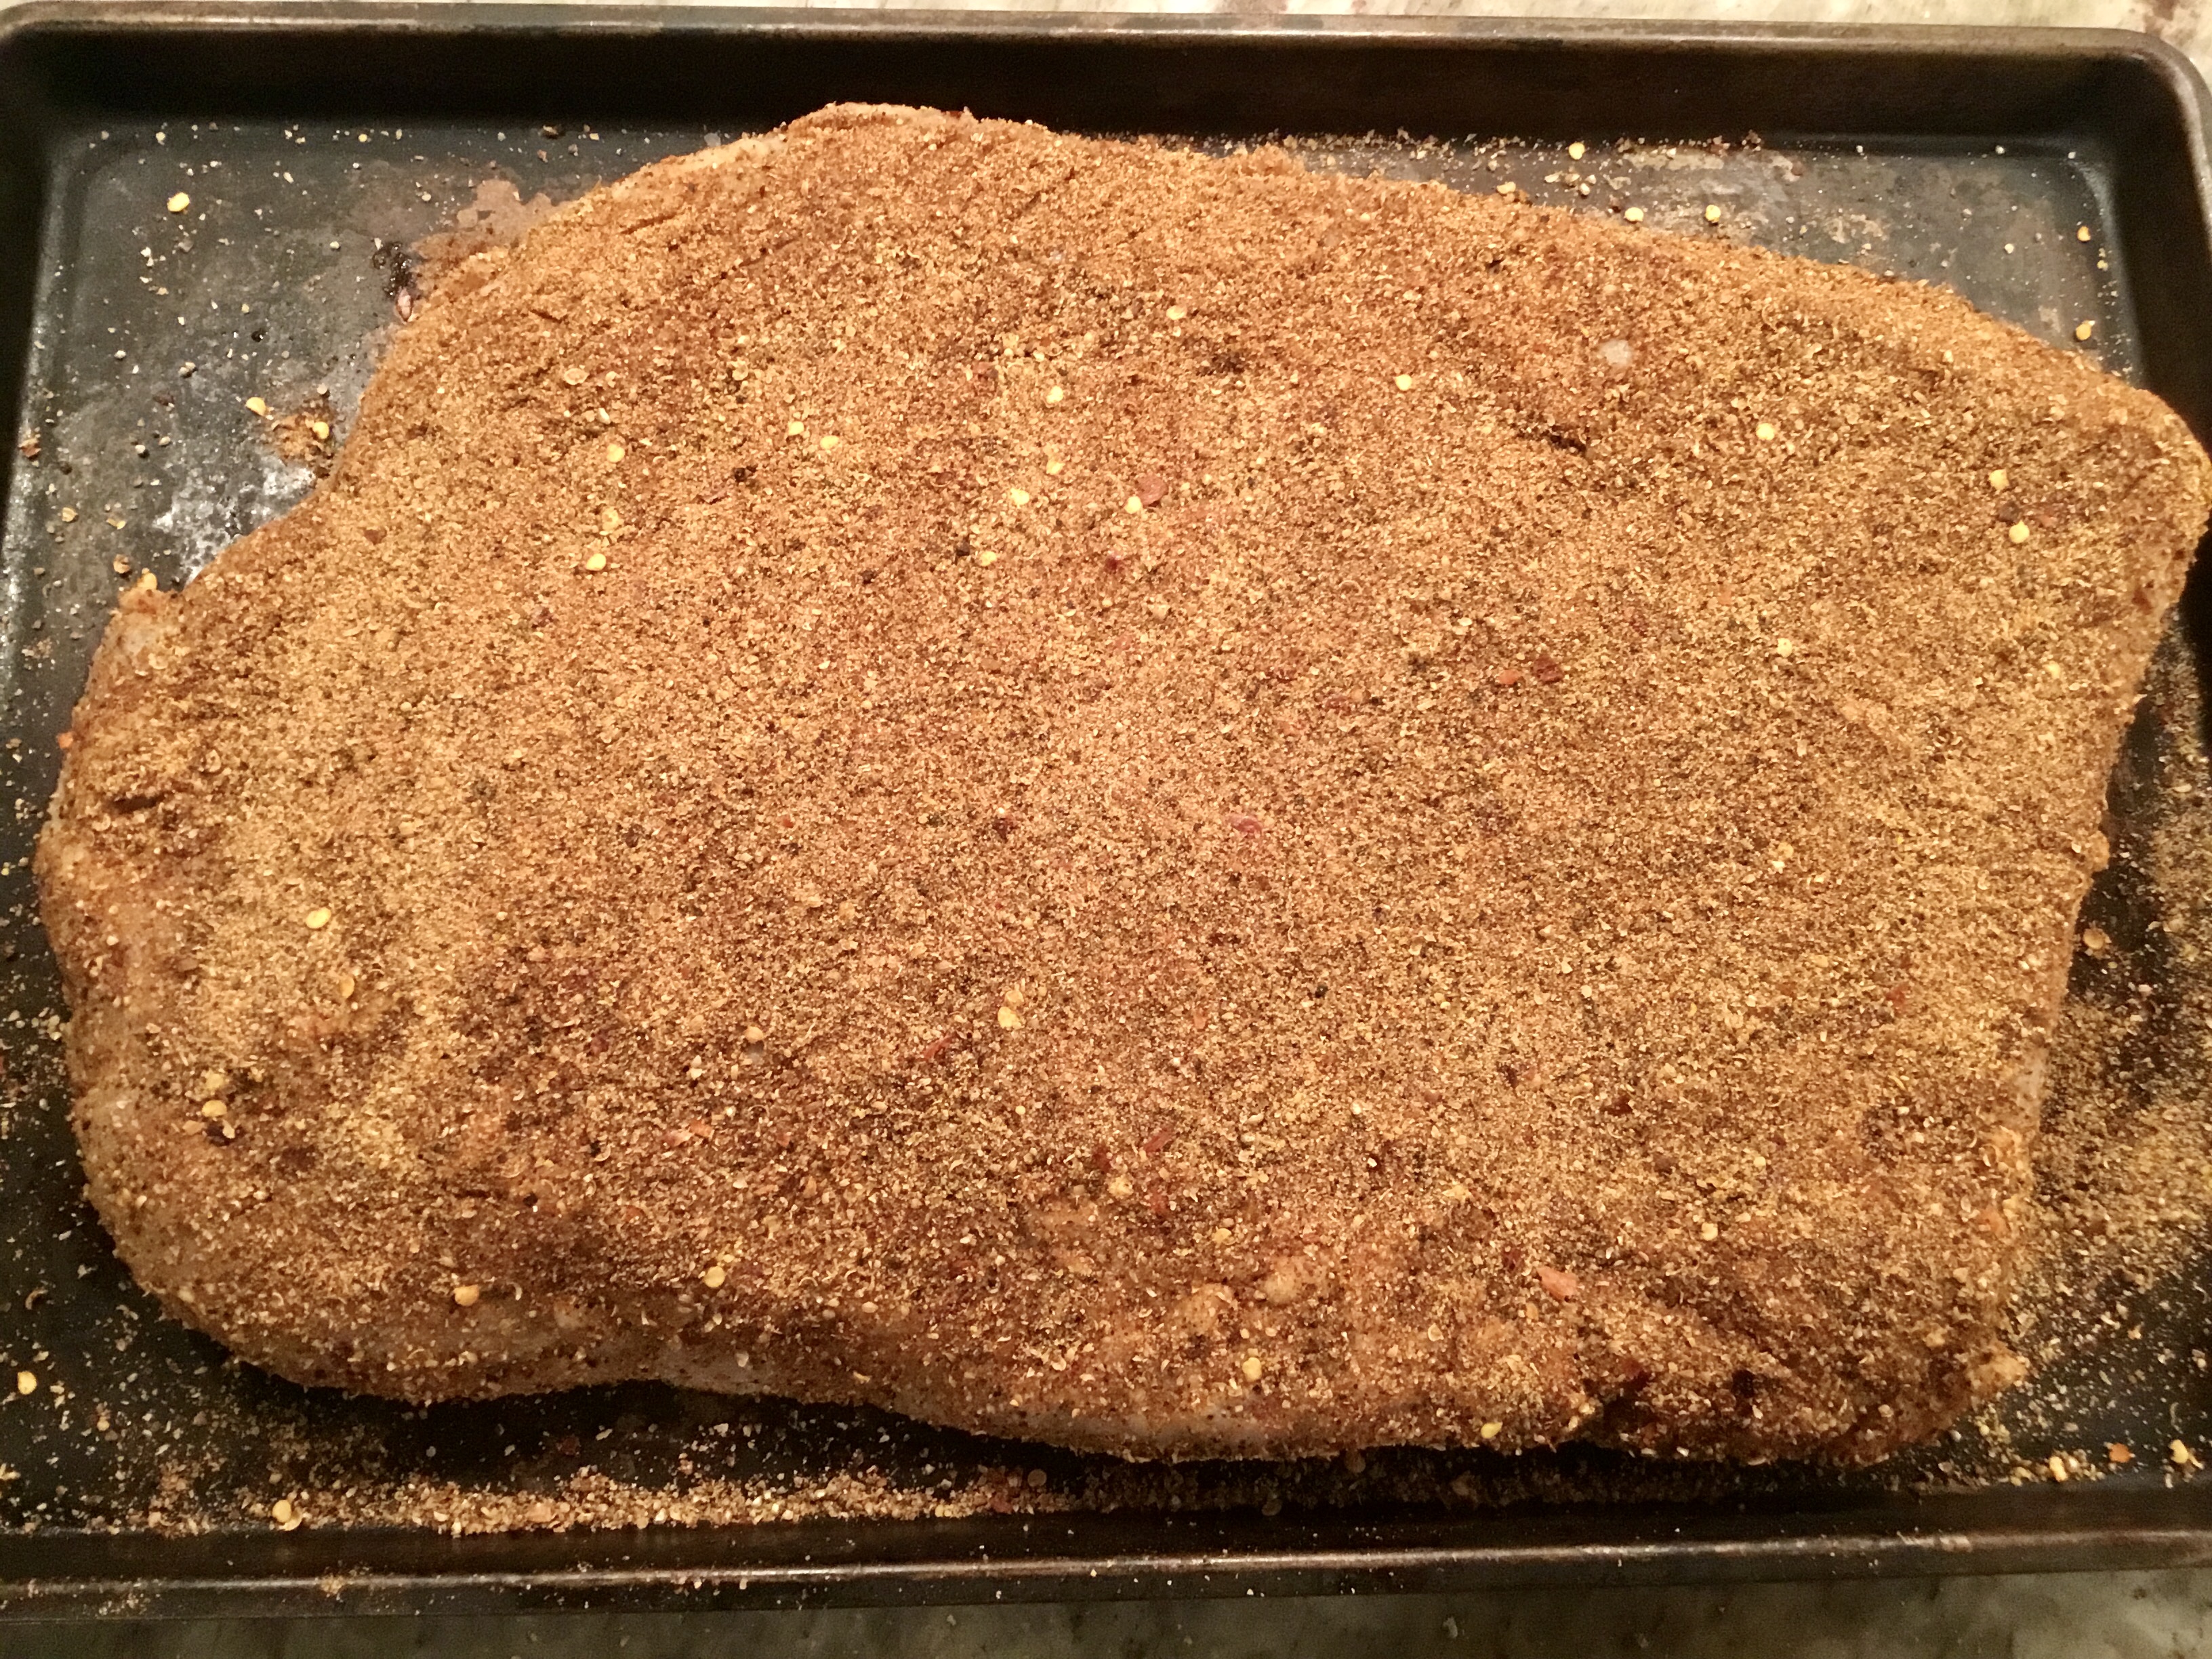 Add your seasonings and press into the meat on all sides. Vacuum pack and place in the refrigerator 4 days with a heavy weight on the top to force the seasoning into the meat.
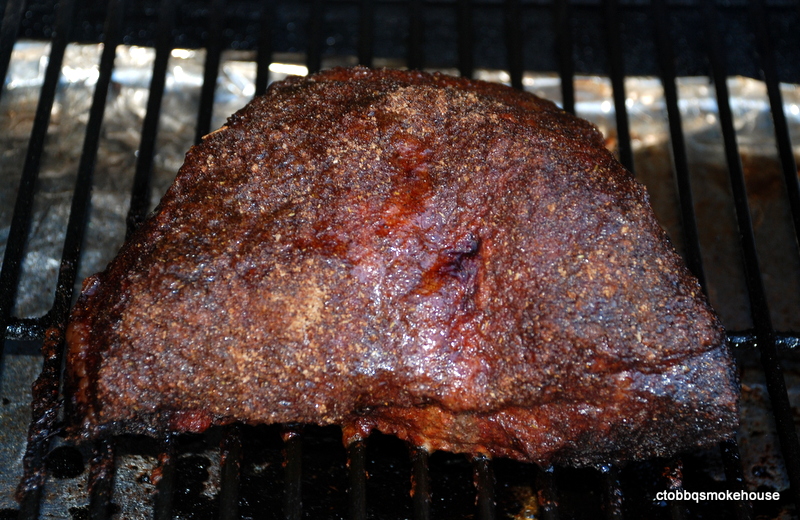
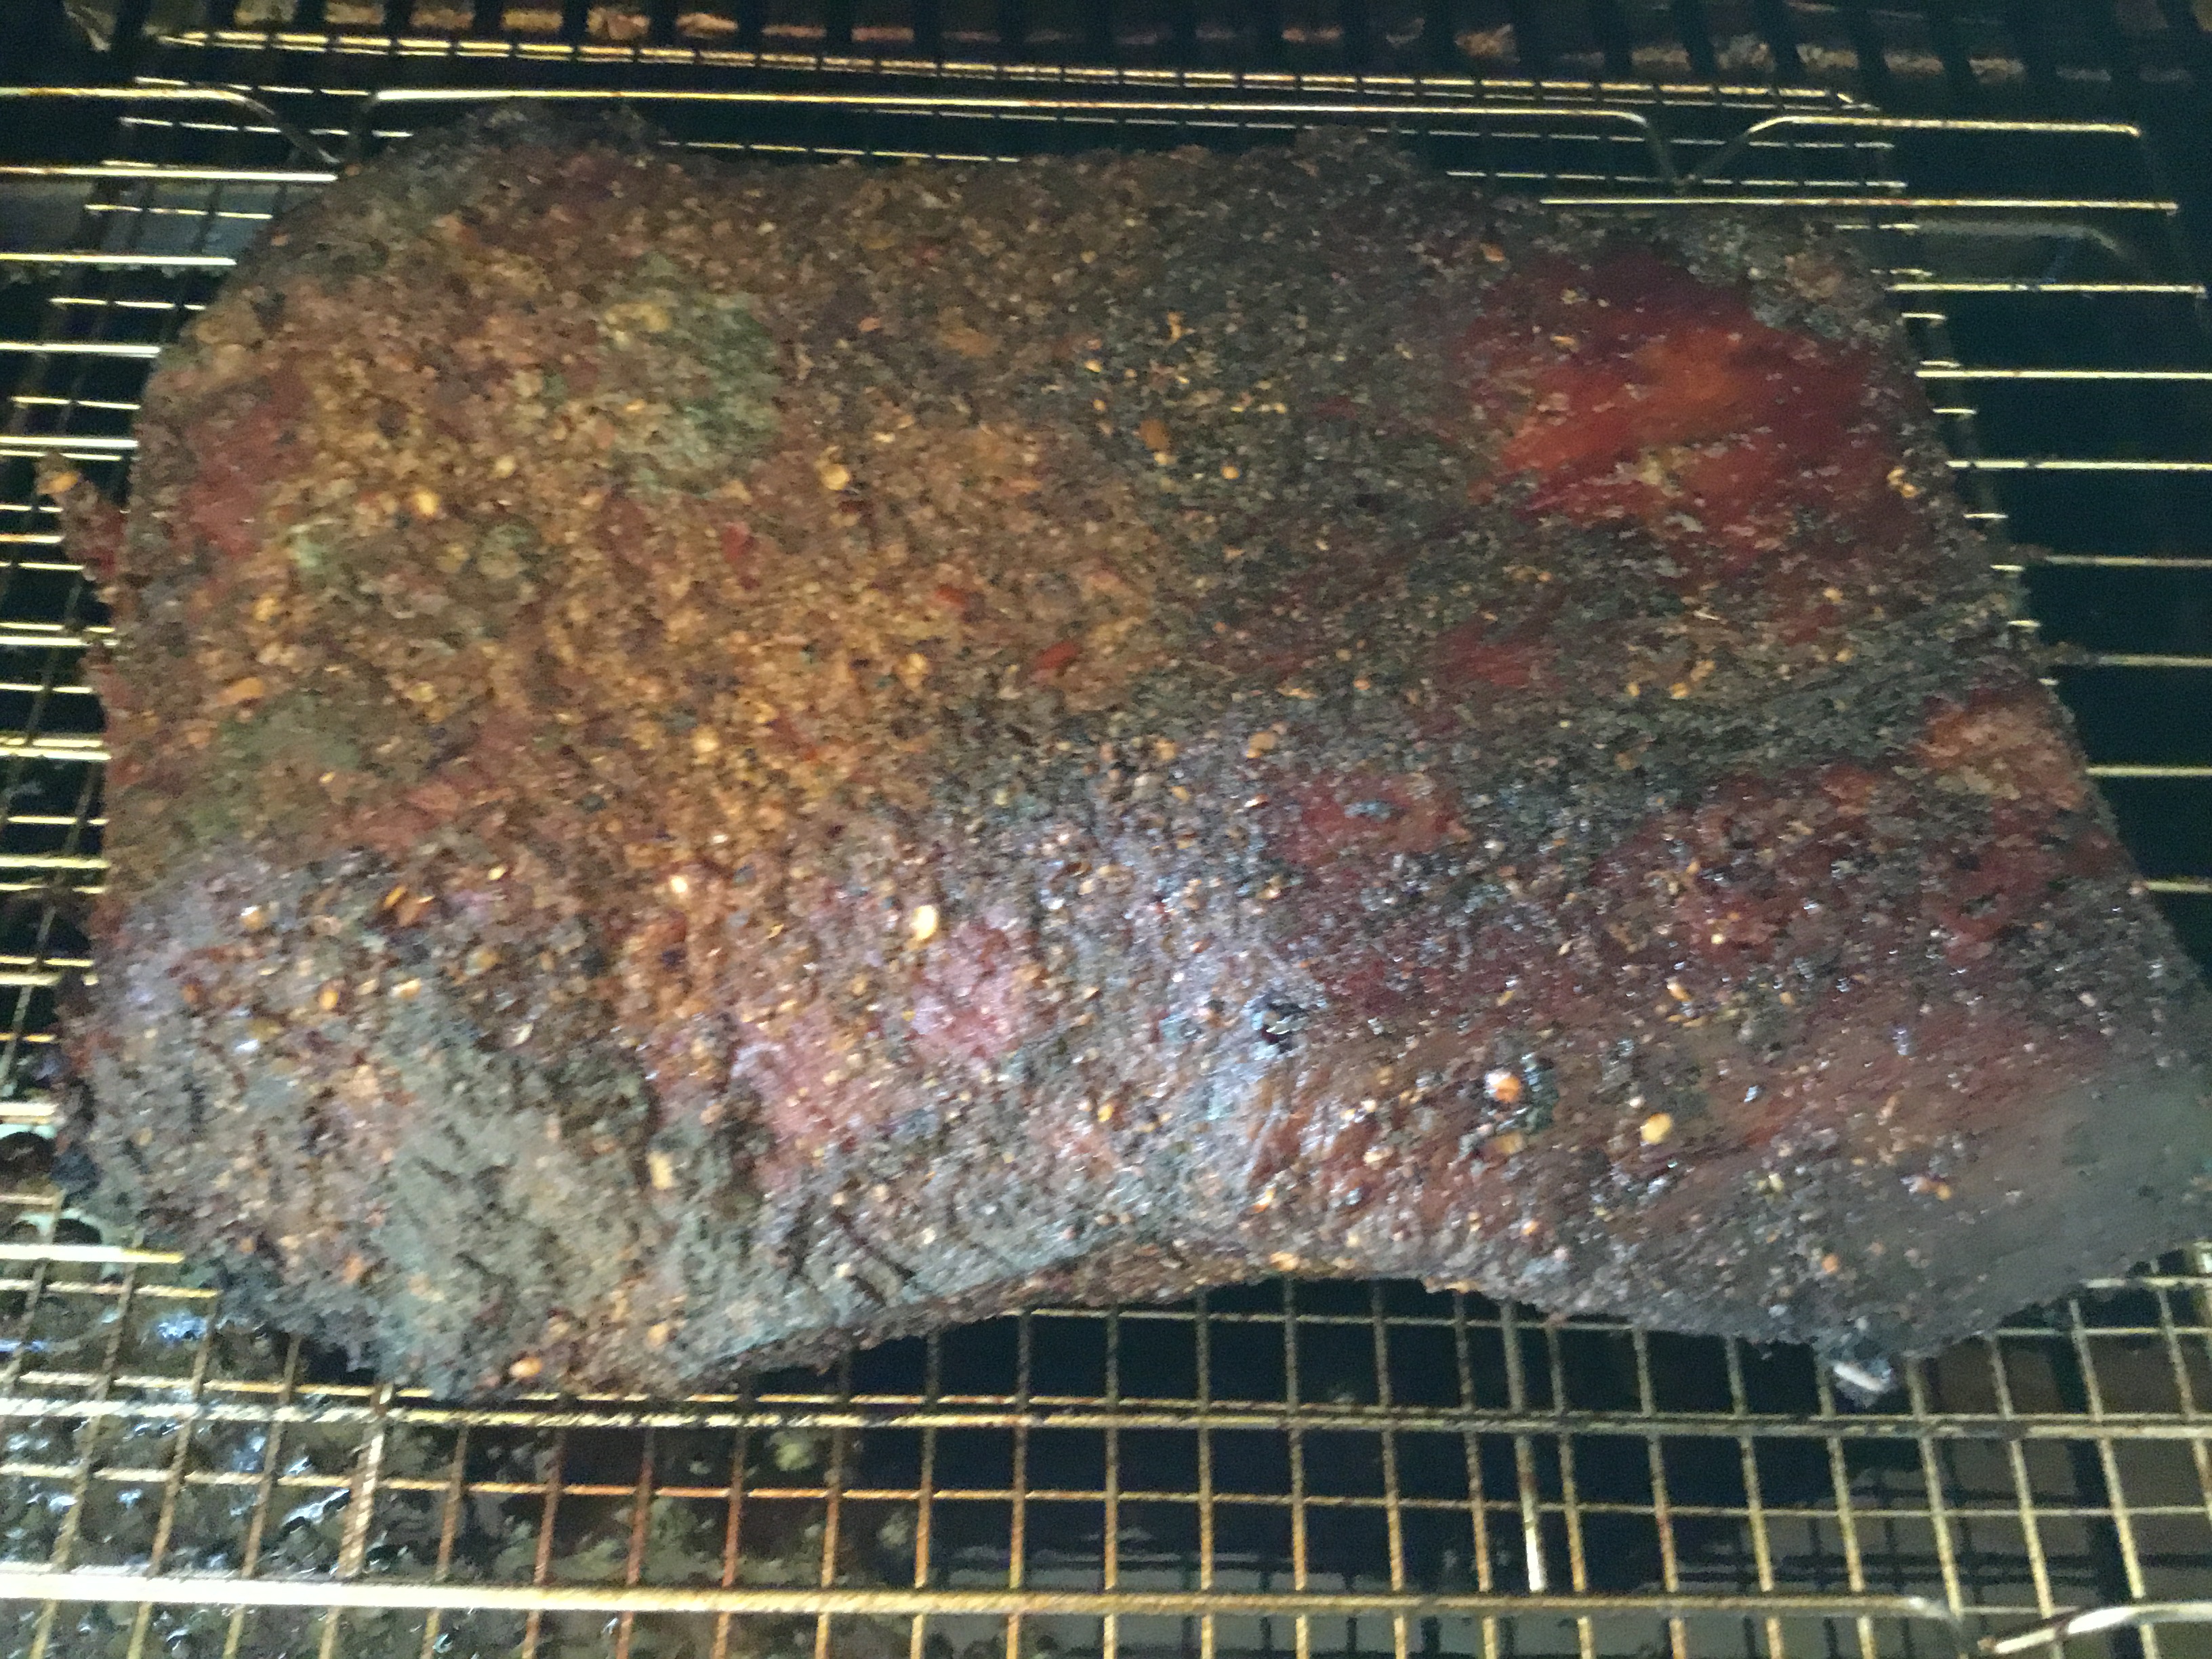 Place in a 225 degree smoker and smoke for 6 hours spritzing meat with apple juice every hour.
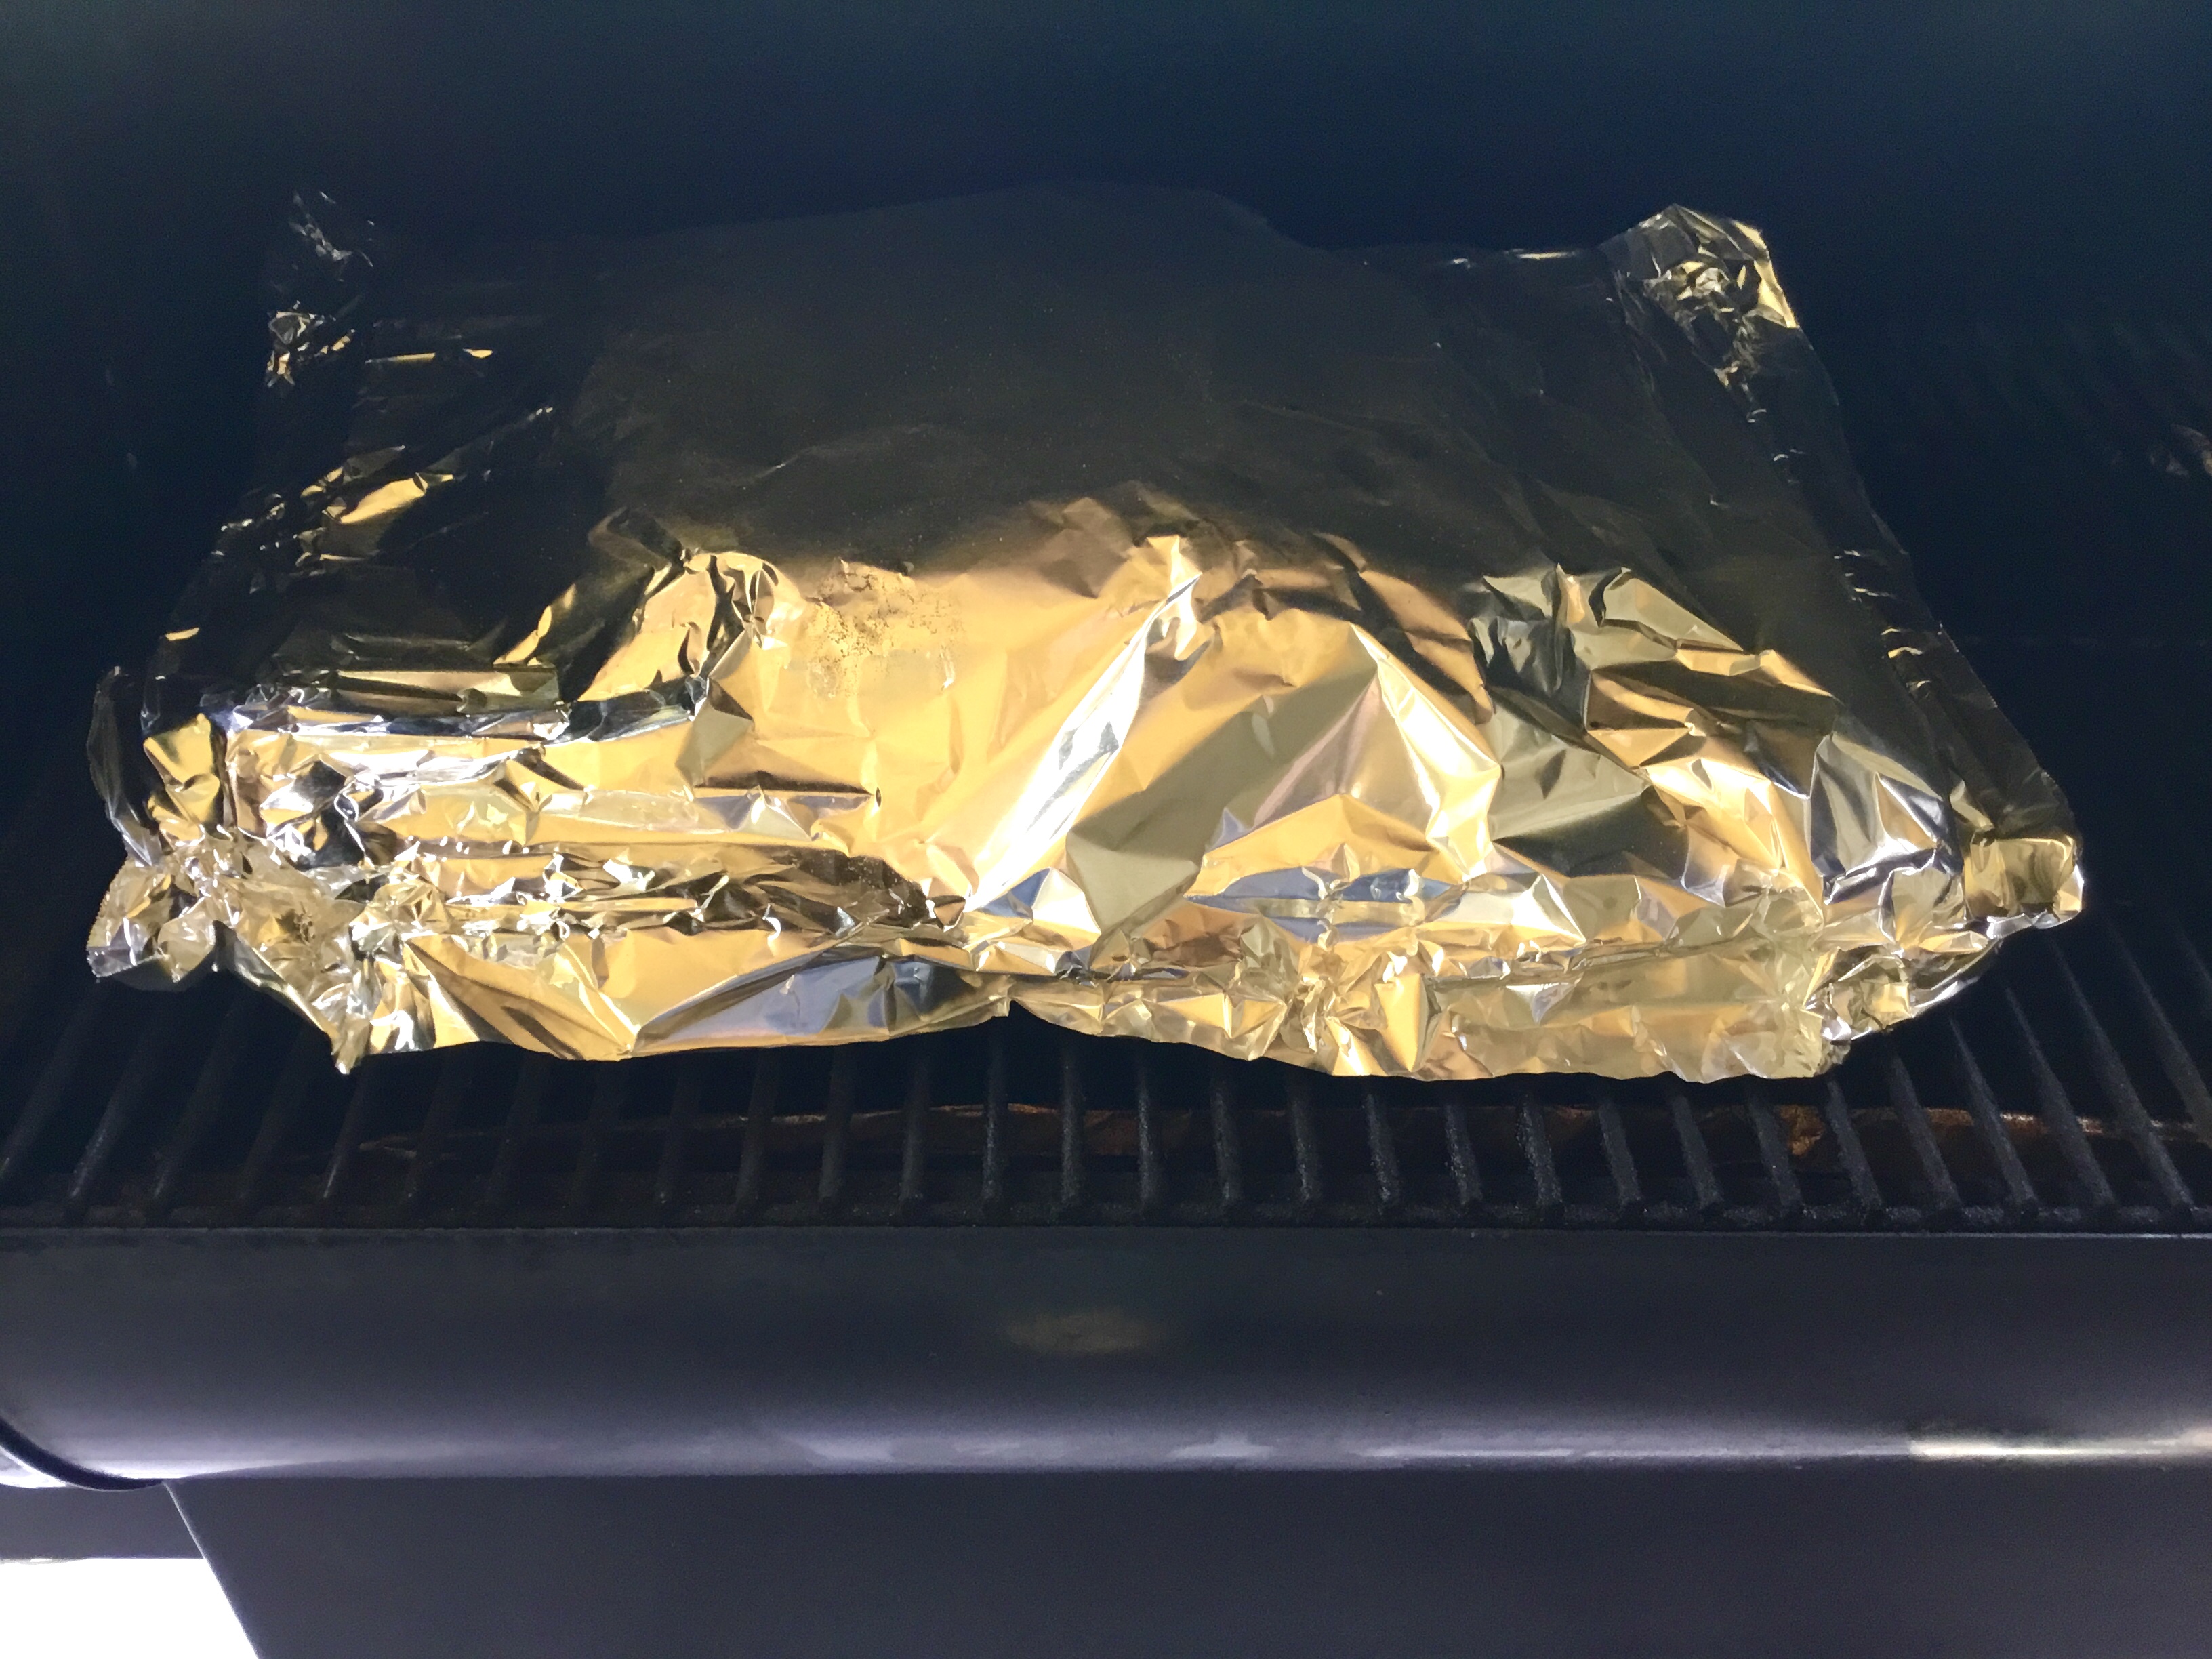 After 6 hours, pour hot water in the pan under the pastrami, cover with foil & continue to smoke another 2 hours.
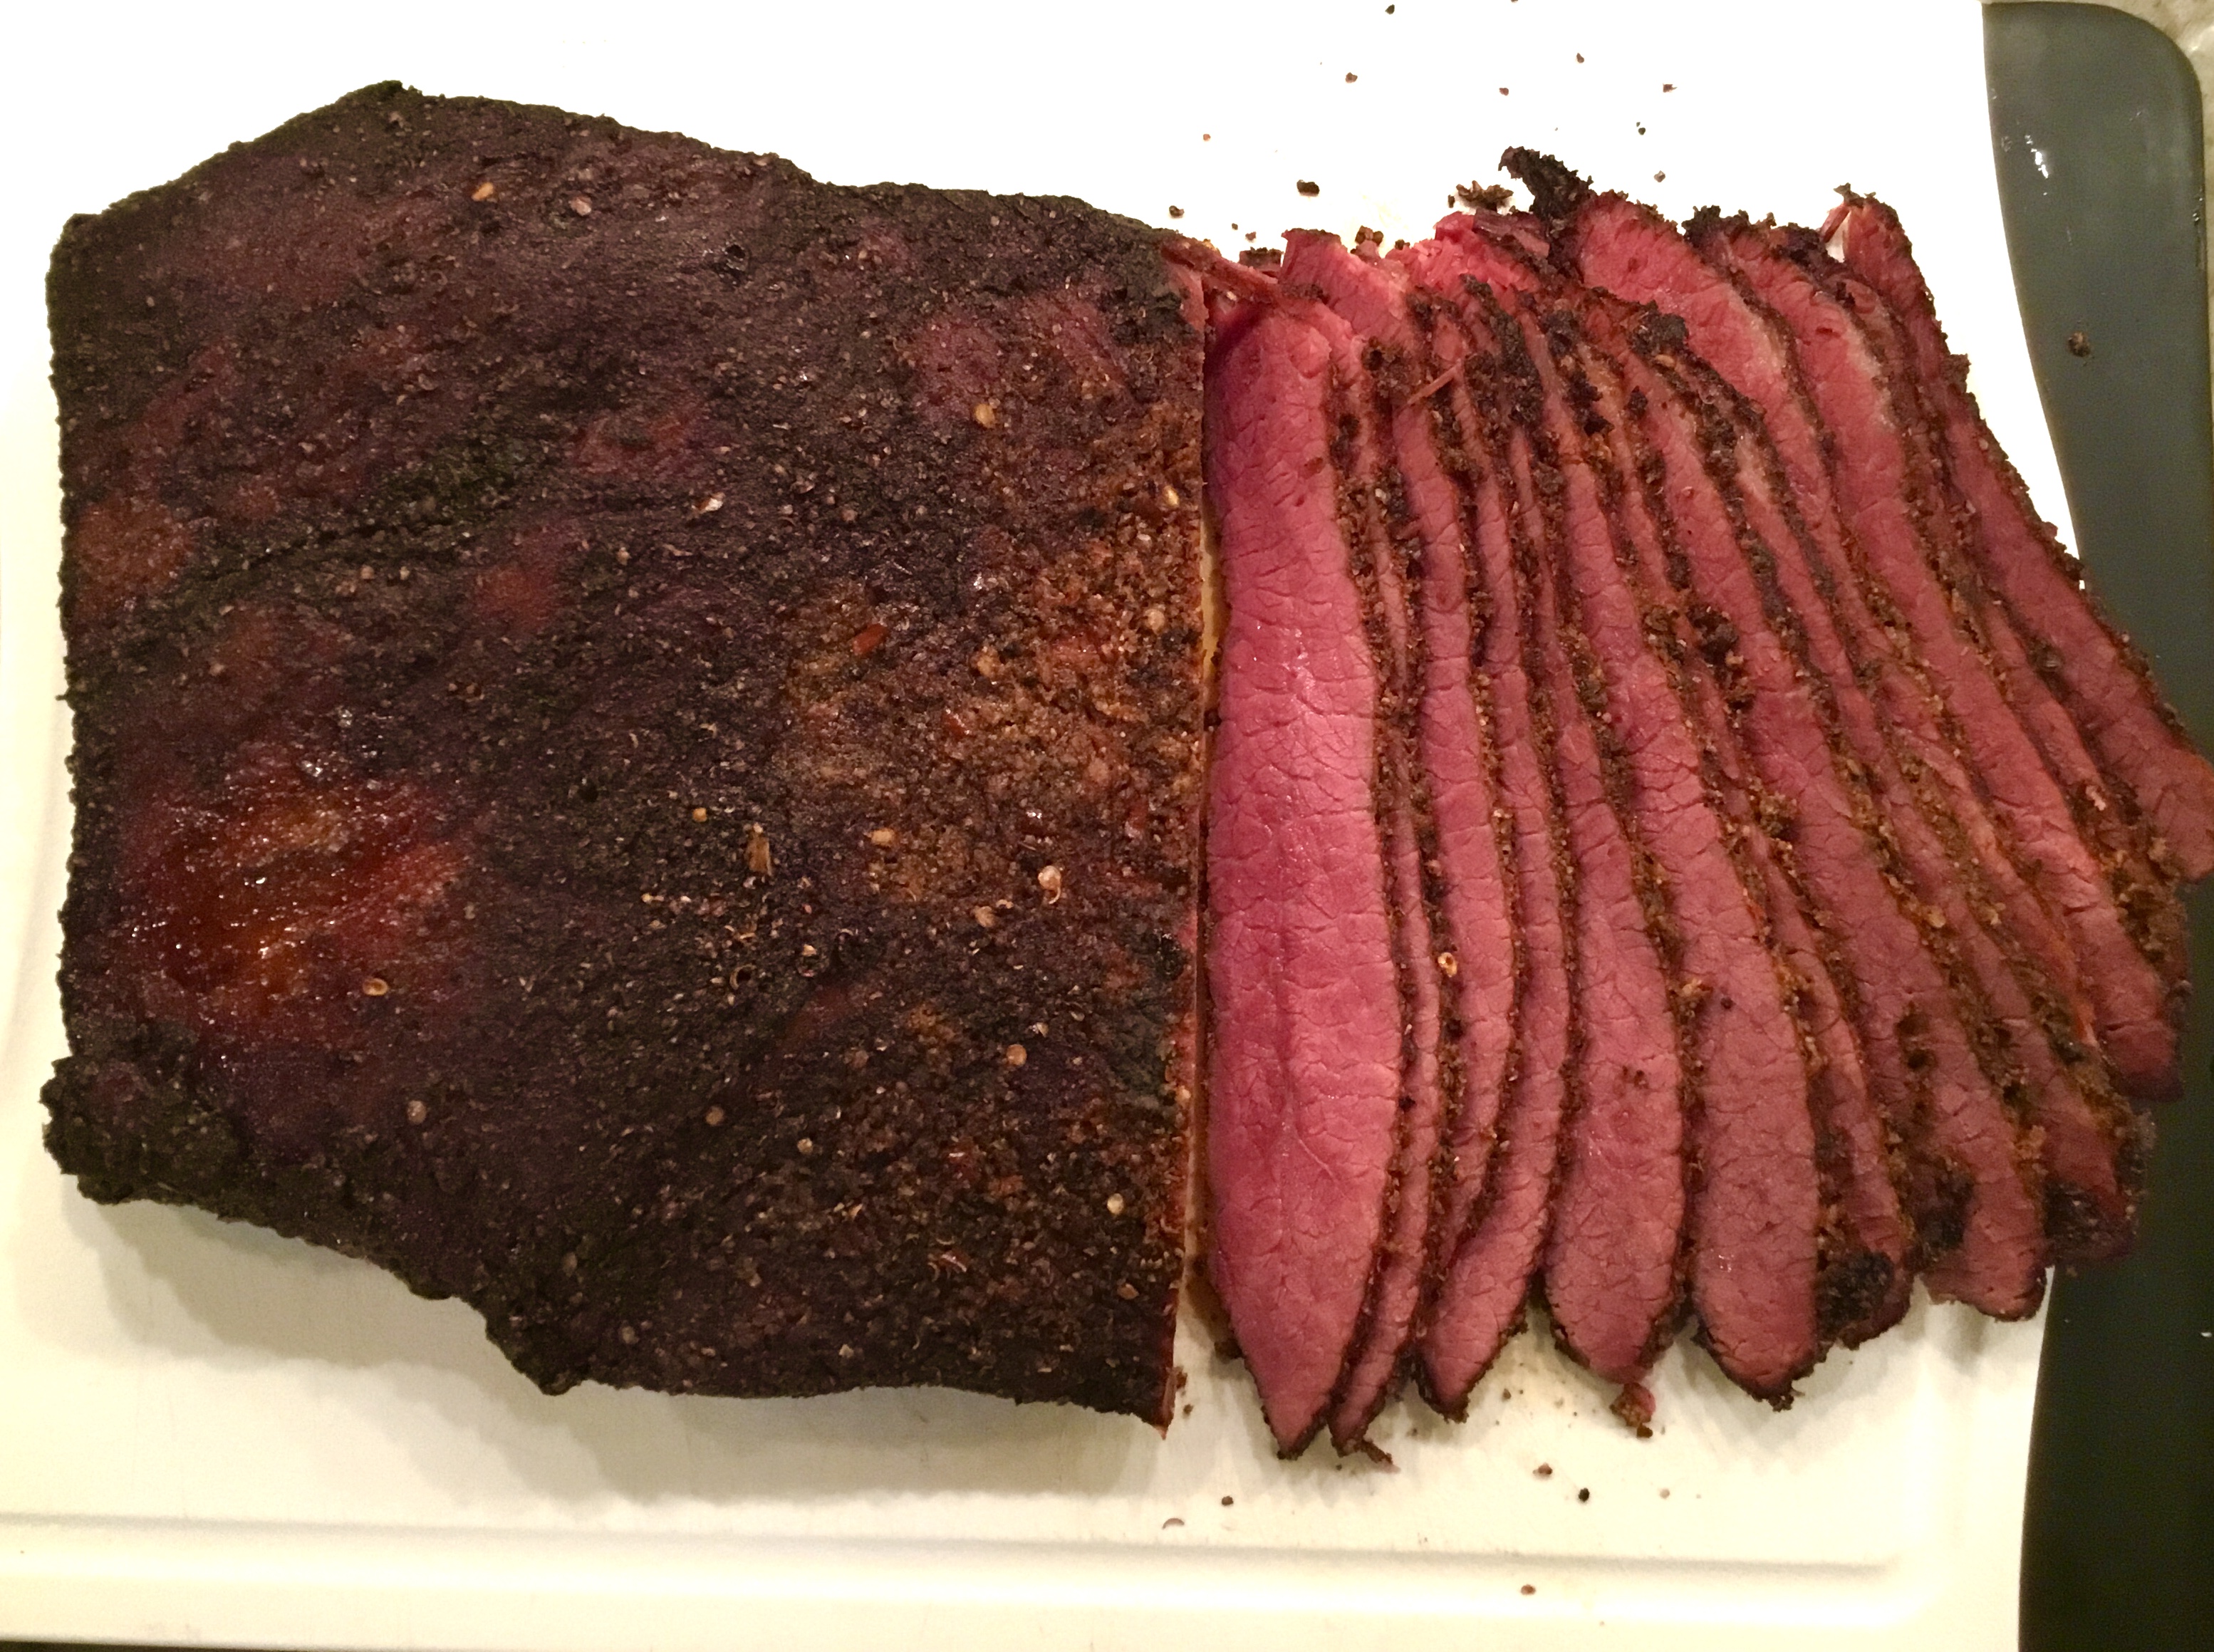
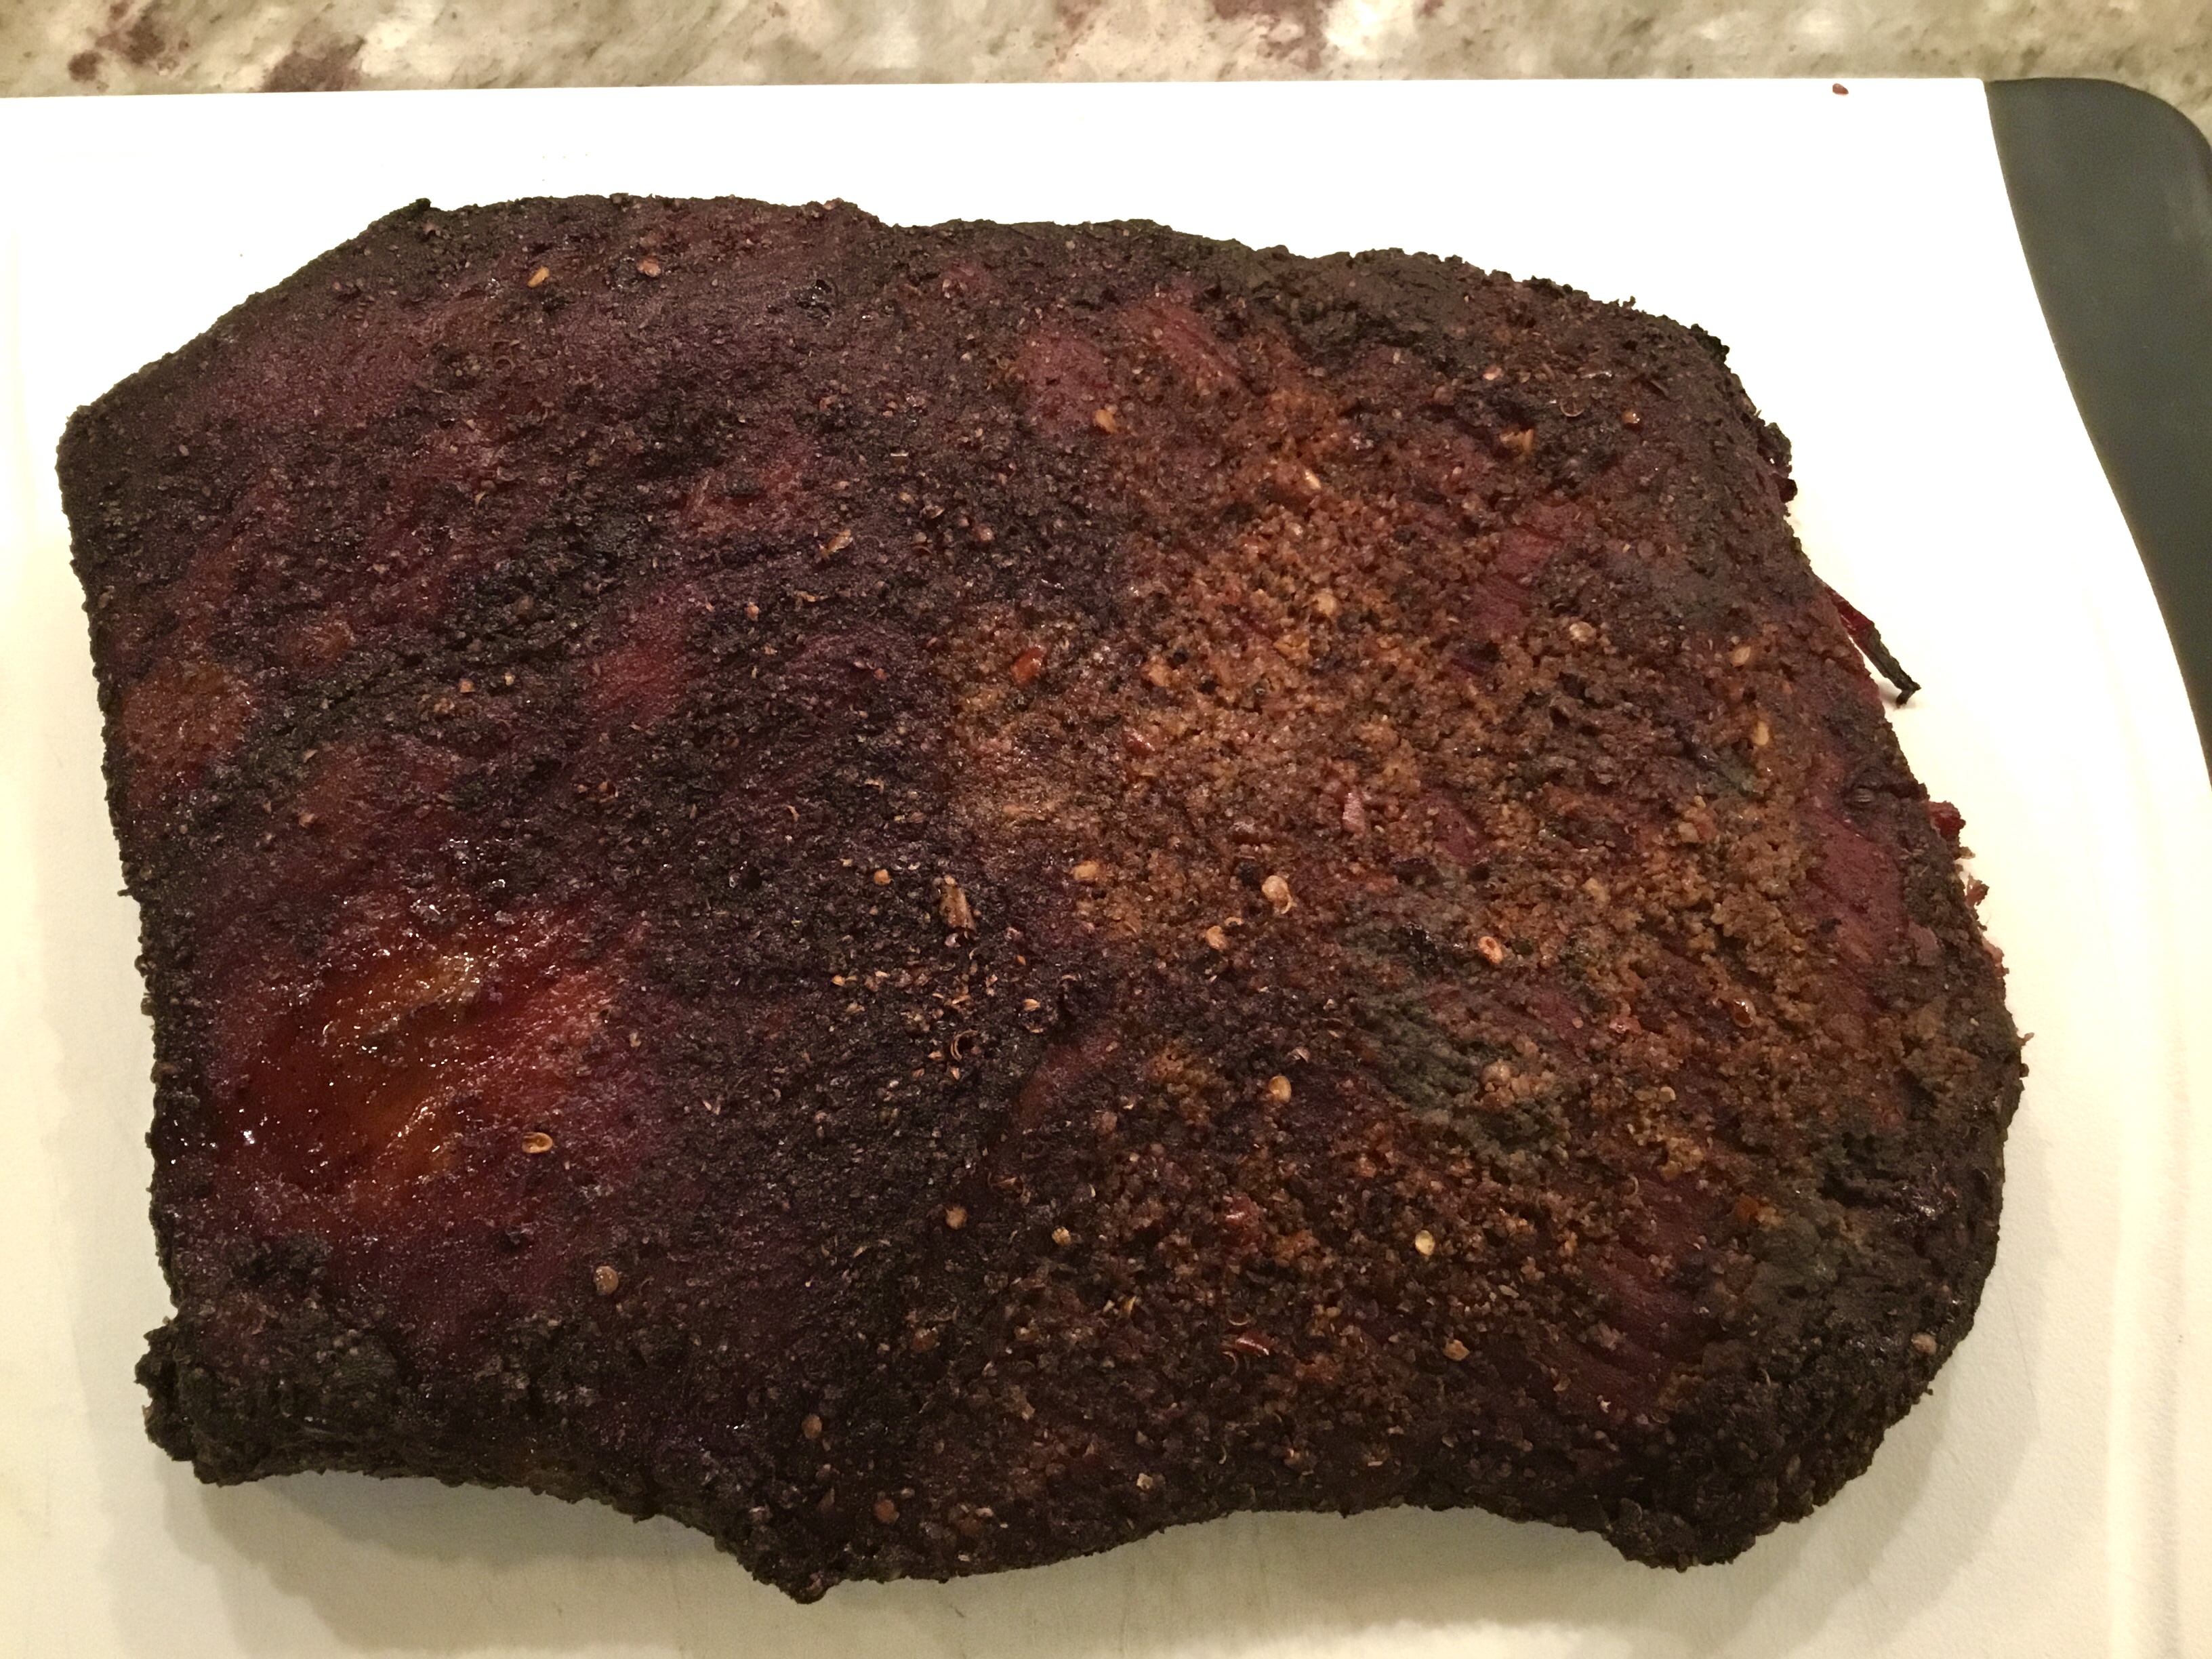 Remove from smoker and let rest 30 minutes before slicing.
This is what you will end up with. Delicious!!
Recipe:
For the brine:
1 gallon ice cold water
8 ozs kosher salt by weight
3 tsp. instacure #1
I cup firmly packed brown sugar
12 cloves fresh garlic, minced
For the rub:
2 tablespoons smoked paprika
2 tablespoons coriander seeds
2 tablespoons cracked black peppercorns
2 teaspoons yellow mustard seed
1 tsp. red pepper flakes
1 Tbs. garlic granules
1 Tbs. onion granulesPlace coriander seeds, yellow mustard seeds in a spice grinder and pulse just until seeds are crushed. Mix in the rest of the spices.
Follow instructions above.


Home Cured Bacon
There isn’t any commercial made bacon that can compare to home cured bacon. I make this twice a year. I buy a 12 pound pork belly, cure, smoke & slice it. I end up with around 10 lbs of the best bacon I’ve ever eaten.

I start by mixing up the curing spice. Then I cut the the pork belly into thirds (in half if smaller than 12 lbs). I rub each piece with liquid smoke and season with the curing spice. I put each piece in a vacuum bag and seal. Place stacked in the refrigerator with a weight on top (I use a pizza stone). Turn every other day for 14 days. Remove from the vac bags and rinse with cold water. Pat dry with paper towels and place on a rack to dry. I put the rack on the laundry machines and turn on a fan. It takes around 3 hours for the meat to develop a nice pellicle.

Place in a smoker heated to 130 degrees. Apply a heavy smudge for 3 hours. Raise the smoker temp to 165 degrees and continue smoking with normal smoke until the internal temp reaches 150. Remove from the smoker and cool. Then refrigerate overnight.

Remove from the refrigerator and slice. I use a meat slicer but if you plan to cut it by hand I would recommend partially freezing it for an hour or so. Vacuum pack in portions that will fit your family needs. It will keep nicely in the freezer for at least 6 months.

Recipe:
1 ten to twelve pound pork belly, skinless
Mix salt, brown sugar, & instacure #1 using Dry Cure Calculator found on diggingdogfarm.com. Add 1 Tbs coarse black pepper if you like. Sprinkle 1/4 of the cure on a sheet pan. Cut belly crosswise into three equal pieces. Brush each piece on all sides with liquid smoke. Press each piece into cure on all sides adding more cure until it is all used. Vacuum pack each piece and refrigerate for 14 days, turning over every other day. Remove from vac bag, rinse @ pat dry. Place on racks to dry using a portable fan. Dry until a nice pellicle is achieved. Place in 130 degree smoker for 4
3 hours. Raise temp to 165 and continue smoking until the internal temp reaches 150. Allow to cool to room temp. Wrap and refrigerate overnight before slicing. Use in a week or freeze up to 6 months.
Smoked Beef Brisket Flat
When smoking a beef brisket I usually use a “full packer Brisket”. This has two distinct cuts, the point and the flat. They are separated by a thick layer of fat. The point is the thick cut on top, with the flat being on the bottom. The picture above is the flat. You can separate these two cuts by cutting through the fat layer being careful to leave about 1/4 inch of fat on the top of the flat. I use the point to make my burnt ends and the flat for slicing. Today I am smoking just the flat since I am preparing BBQ for just me and my wife. There will be plenty of leftovers since a flat is around 5-7 lbs. raw and will lose about 30 % of weight when finished. That will leave about 3 1/2 – 5 lbs. finished meat. The first step is to prepare a marinade and inject to meat. I use equal amounts beef broth, cider vinegar, and olive oil. I emulsify them in a blender until smooth. For this brisket I used 2/3 cups each. Inject the meat along the grain every inch or so. Be careful because this is a coarse grained cut and the marinade will squirt out in all kinds of places and ruin your shirt! Place the meat in a large ziplock bag and add the rest of the marinade. Place in the fridge for at least 24 hours.
When you are ready to smoke the brisket, remove from the marinade and pat dry. Apply your favorite rub (or you can use my “Basic Rub Recipe” found on this blog) on the top, bottom, and sides of the meat. Place in a smoker @ 225 degrees and smoke for 6 hours.
At the end of 6 hours it will look like this.
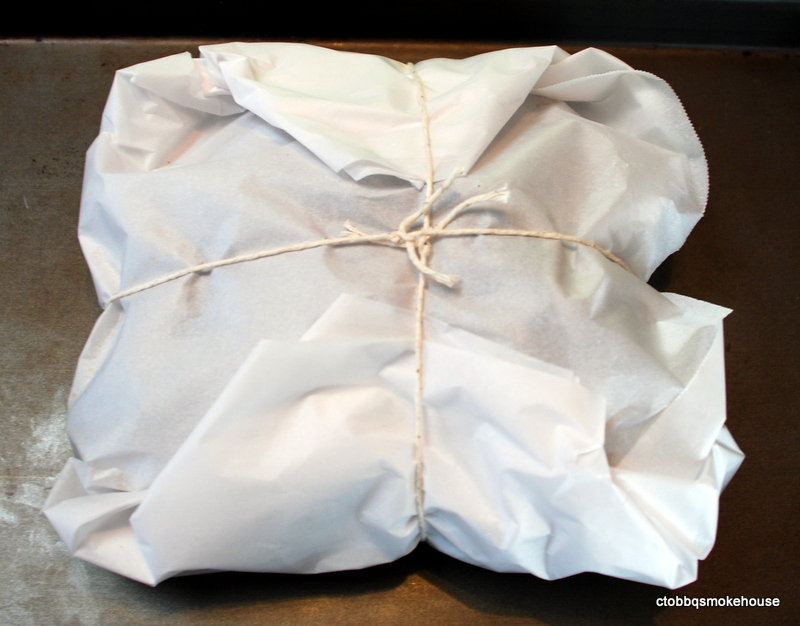
I remove the brisket from the smoker and wrap in unwaxed butcher paper and tie with kitchen twine. You can use heavy duty foil if you want but I find that using butcher paper the meat retains the moisture whereas the foil causes a lot of the juices to come out of the meat leaving a considerable amount in the bottom of the foil. There is none in the paper. The smoking process is done but the cooking process is not. You can place the wrapped brisket back in the smoker or place in an oven @ 225 degrees for another 3 hours. I recommend the oven to save on smoker fuel.
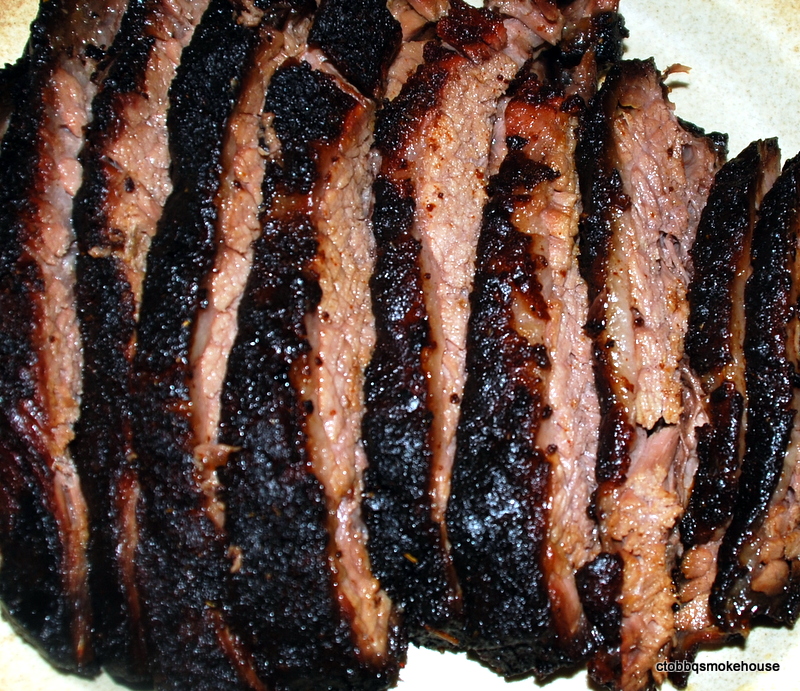
This is what makes it all worthwhile. It is smokey and melts in your mouth. NO KNIVES NEEDED!
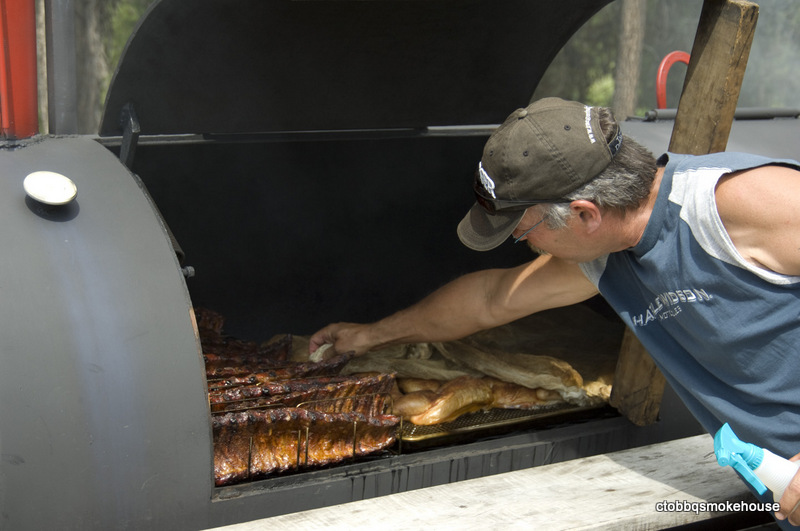
Texas Style Barbecue
I have been serving up Texas BBQ for 35 plus years. Brisket is “King” of course in Texas, but ribs, chicken, pulled pork & sausage can also be found at most places. I love it all! I fix it all! I decided to start this blog so that I could see the transformation of my BBQ skills over time. In preparation to start this blog, I made four trips to Texas in 2012 just to hit as many “Que” joints as I could. This was to remind myself why I fell in love with Texas BBQ 35 years ago. Talked to a lot of pitmasters and just plain old folks who live for the “Que”. Everyone has their own style and their own rub, own mop, own injection, own type wood, own temp, own time, and in the end, their own “fans”! My family and friends are my target audience & guinea pigs like most home BBQ’ers. By starting this blog I figured I’d get a little more unbiased opinions from other BBQ aficionados. I’d like to hear from you as I am always looking for new recipes and techniques.
